In journey steps like Login Form and Collect information, the form builder lets you customize the client-facing form shown to the end user. To open the form builder, click the gear icon for Views & Actions in either step.
With the form builder, you can:
- add, remove, and reorder authentication methods, forms, and actions
- drag and drop preconfigured form elements into a selected form
- configure item-level behavior such as item name, default value, mandatory, or read-only
- in SSO journeys, preview a saved style for the Mosaic-hosted experience
The form builder is component-based: you select from a library a preconfigured component and then customize its built-in behavior and relevant options.
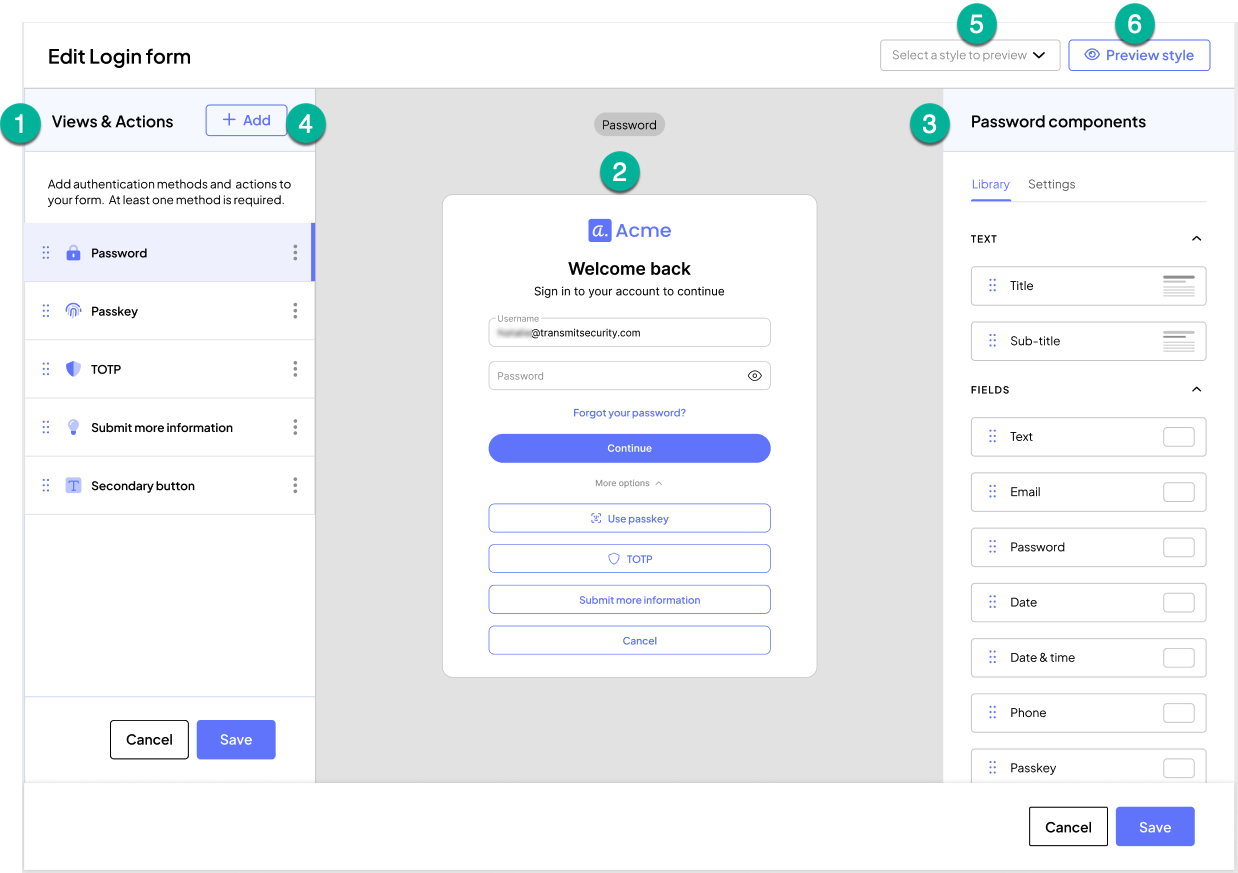
In the form builder:
| Element | Description |
|---|---|
| 1. Main editing canvas > Left column | Shows the step's configured forms and actions. Each form represents a specific user interaction scenario, so the same step can display different UI depending on the user's selection or interaction within the step. |
| 2. Main editing canvas > Center column | Displays the visual form builder, where the selected components are rendered. |
| 3. Main editing canvas > Right column | Contains the Library of available components, such as fields, text elements, separators, and buttons. From there, you can drag components into the form and then customize each component's built-in behavior and relevant options in the Settings tab, such as item name, label, mandatory, and read-only. |
| 4. Add button | Lets you add either a Form or an Action in the left column.
|
| 5. Style dropdown | In SSO journeys only, lets you choose which saved style to preview on the current form. For more, see Preview a style in SSO journeys. |
| 6. Preview button | Opens a preview of the form using the current configuration. For more, see Preview a style in SSO journeys. |
A typical workflow in the form builder looks like this:
- Open Views & Actions from the step configuration.
- Select the form or action you want to edit from the left-side panel.
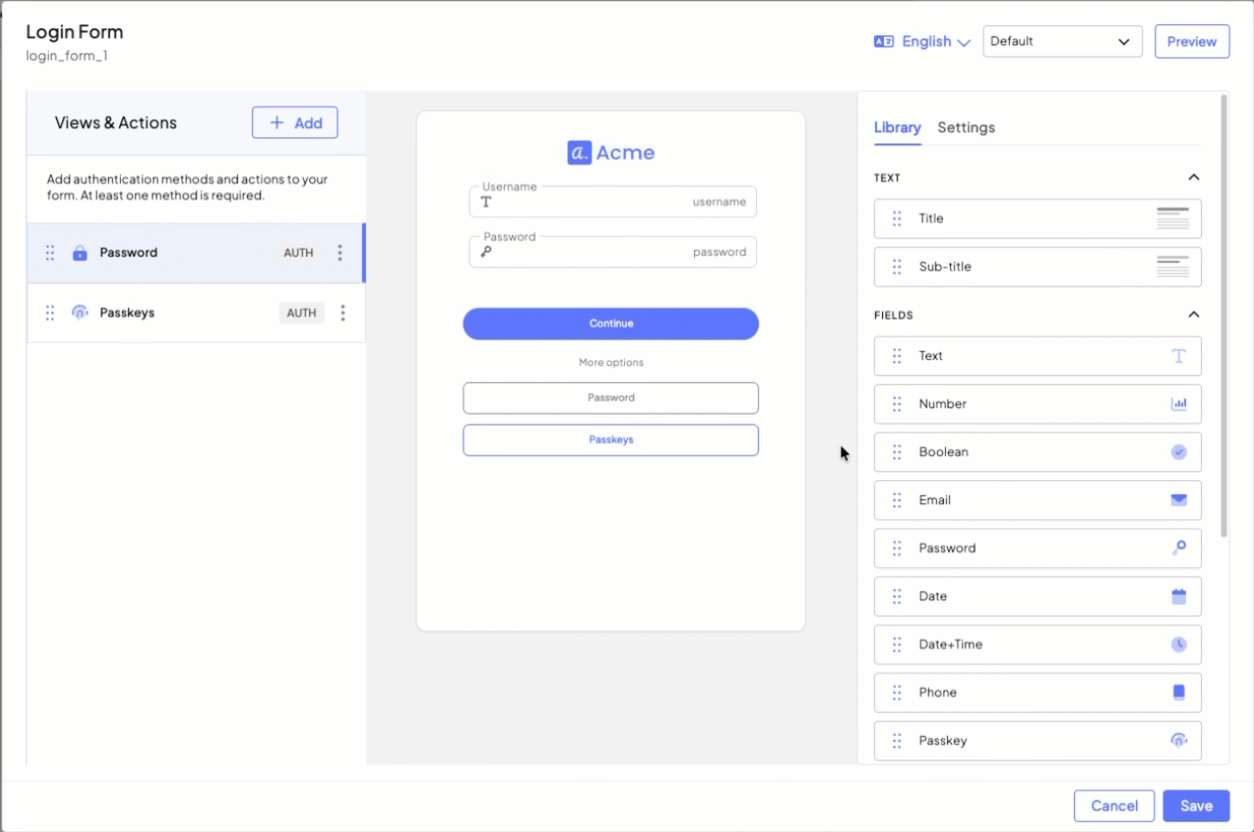
- In the Login Form step, each form typically represents an enabled authenticator and its related user interaction scenario. You can add or remove authenticators in the step, and each supported authenticator has its own editable form. At least one authentication method is required.
- In the Collect information step, you can configure one or more forms to represent different user interaction scenarios for the step, plus any actions you want to expose to the user.
- Use the Library tab to drag text and field components into the center preview area.
- Select an item in the preview to edit it from the Settings tab.
- Use the top-right controls to open Preview or save your changes. In SSO journeys, you can also choose a style to preview.
In SSO journeys, the style dropdown lets you preview saved styles on the current form while keeping the same underlying structure and behavior.
- In SSO journeys, a style appears in the dropdown only if it has first been associated with the relevant SSO client.
- In non-SSO journeys, the style dropdown is not available.
For more about creating and managing styles, see Manage styling for the Mosaic-hosted SSO experience. For the SSO-specific client association requirement, see Assign styles to SSO clients.
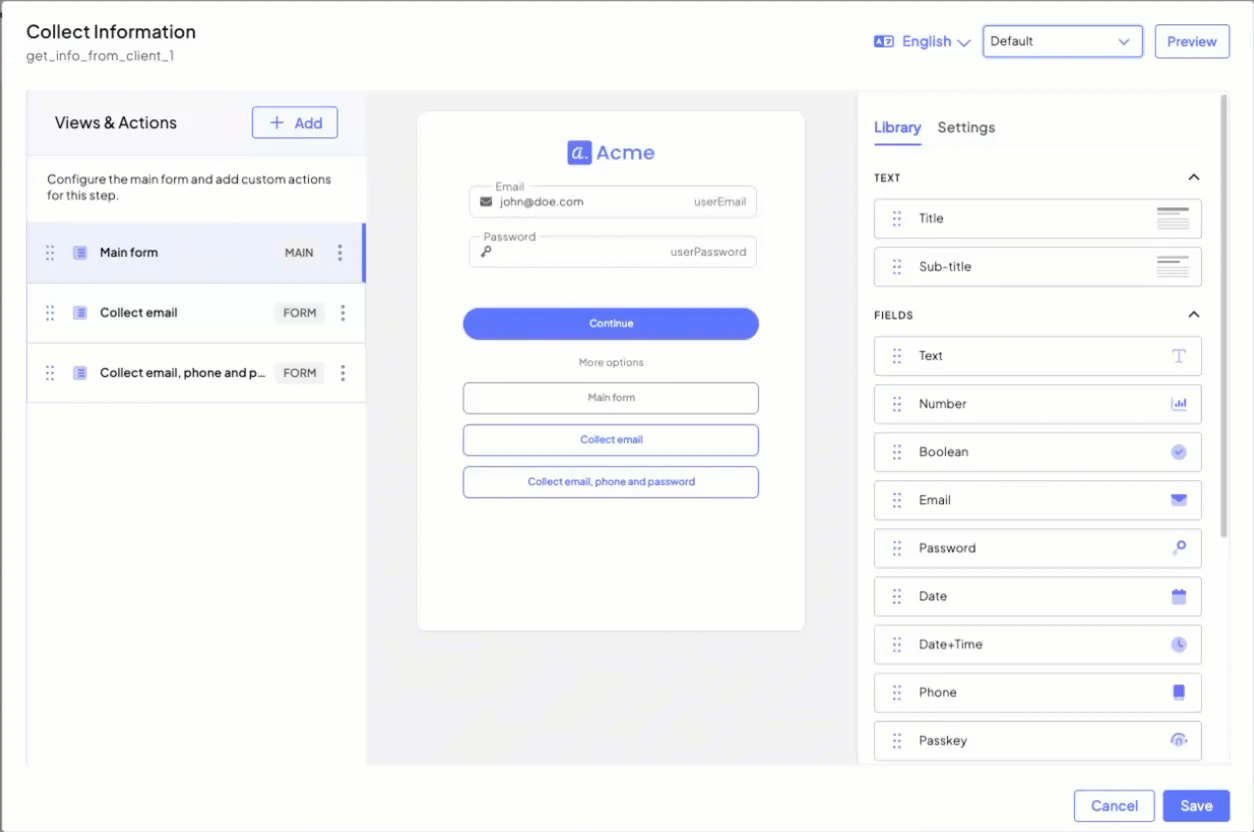
This example shows a Collect information step with three forms configured in the same step:
- Main form, which collects email and password
- Collect email, which collects only the email address
- Collect email, phone and password, which collects email, phone number, and password
Each form represents a different user interaction scenario within the same step, so the UI can change based on what the user chooses to do.
In other scenarios, such as a profile update flow, a form can prefill a field with an existing value by using Default value and prevent the user from changing it by setting the field to Read only.
The client ultimately returns the payload for the form the user completed. For example, if the user completes the form that collects email, phone number, and password, the response can look like this:
// If SDK was loaded via script tag, invoke functions inside 'window.tsPlatform'
ido.submitClientResponse(
    ClientResponseOptionType.ClientInput,
    {
      userEmail: "someone@email.com",
      userPhone: "12127001234",
      userPassword: "MyPass123"
    }
);
As with any form-builder-based step, the keys in the object passed to submitClientResponse() should match the item name values configured in the form. For example, if a field uses the item name userEmail, the submitted object should also use userEmail as the key.