In journey steps like Login Form and Collect information, schemas define the data expected from the client and also affect the UI rendering if using Mosaic's auto-generated client-side forms. You can customize the default schema by adjusting fields, their order, or preset values in the form builder. This allows for precise control over the data structure and client-side rendering.
In the form builder, you can manage default schema:
- Add new fields by selecting + Add field and configuring its settings.
- Reorder fields by dragging and dropping the fields.
- Delete fields you don't need
- Localize the schema (see Journey localization for details)
- Copy the schema in the JSON format to share with the development team
Customizable settings for each field include:
| Field | Description |
|---|---|
| Field name | A field indentifier. |
| Label | An optional field title used for client-side rendering. Can include expressions. |
| Default value | Prefills the field value on the client side. Can include expressions. |
| Data type | Defines the field data type, which can be string, number, or boolean. When rendered on the client side, boolean appears as a checkbox and number as a numeric input box. For string, it either renders as a plain text input or according to the format field described below. |
| Format | Guides the client side on how to render string fields. Options include text, password, email, phone, date, date & time, or passkey. - password, email, phone, date, date & time determine the appropriate input widget to display based on the specified format. - passkey affects the Login Form step, enabling automatic passkey activation from text boxes. For more, see the examples below. |
| Mandatory | When set to true, the field will be considered mandatory input on the client side. Can include expressions, such expressions will be evaluated for being true or false, e.g., user.userEmail != null. |
| Read-only | When set to true, the field will be displayed as read-only on the client side. Can include expressions, such expressions will be evaluated for being true or false, e.g., user.userEmail != null. |
Below are examples of how to create various forms in journey flows. These examples illustrate different configurations for collecting user input, such as email, phone numbers, passwords, and more, in a structured and customizable way.
- Collect email
- Collect email with a "Remember me" checkbox
- Collect email and password
- Collect email, phone, and password
- Update user's details
This example displays a simple form that only asks for the user's email. It could be used as the first step to collect the user identifier before proceeding to a Sign-in or Sign-up flow.
The data type is set to string, indicating the type of value received in the journey. Additionally, setting the format to email ensures the UI input validates the email on the client side.
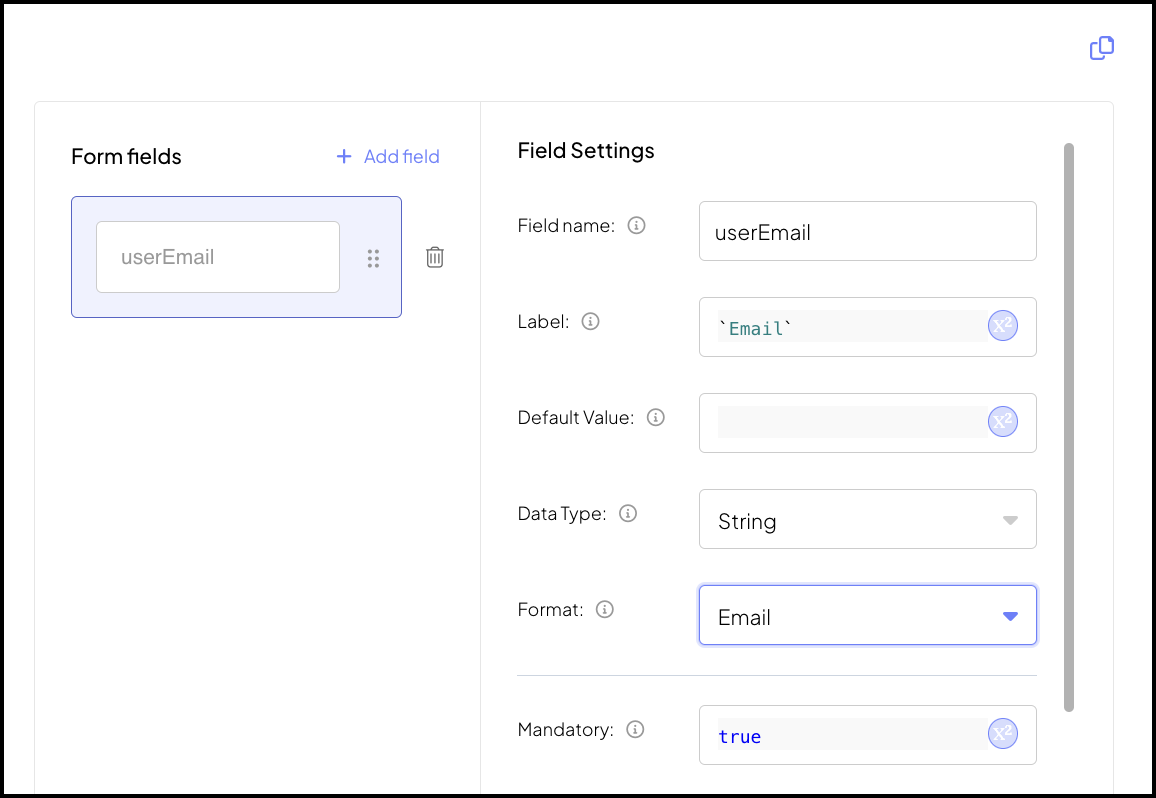
The client will present a form for retrieving this information and return response to the journey. For example:
// If SDK was loaded via script tag, invoke functions inside 'window.tsPlatform'
ido.submitClientResponse(
    ClientResponseOptionType.ClientInput,
    {userEmail: "someone@email.com"}
);Building on the previous example, this example includes a "Remember me" checkbox in addition to the email input. The "Remember me" field data type is boolean.
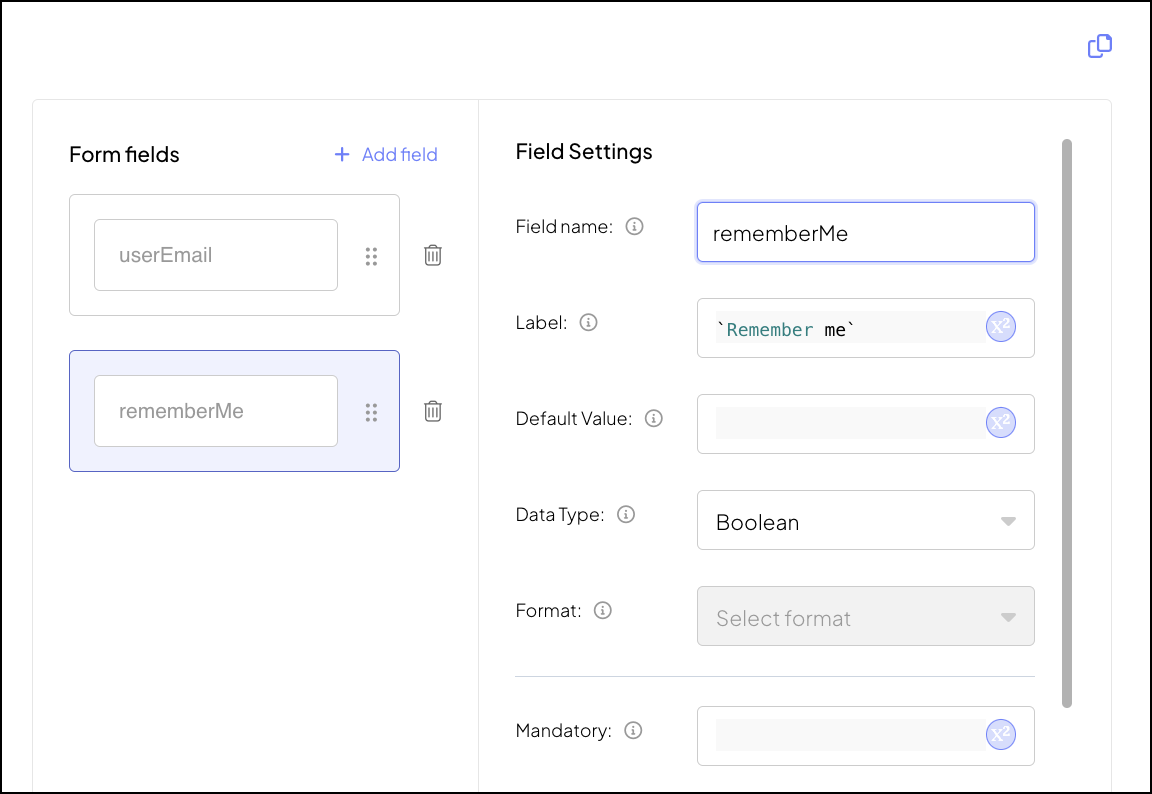
The client will present a form for retrieving this information and return response to the journey. For example:
// If SDK was loaded via script tag, invoke functions inside 'window.tsPlatform'
ido.submitClientResponse(
    ClientResponseOptionType.ClientInput,
    {userEmail: "someone@email.com", rememberMe: true}
);This example represents a typical login form where the username is an email, and authentication requires a password. Like the email field, the password field has a string data type, but setting the format to password instructs the client to render a password input box. Both fields are mandatory and will be rendered in the order they are appear in the form builder.
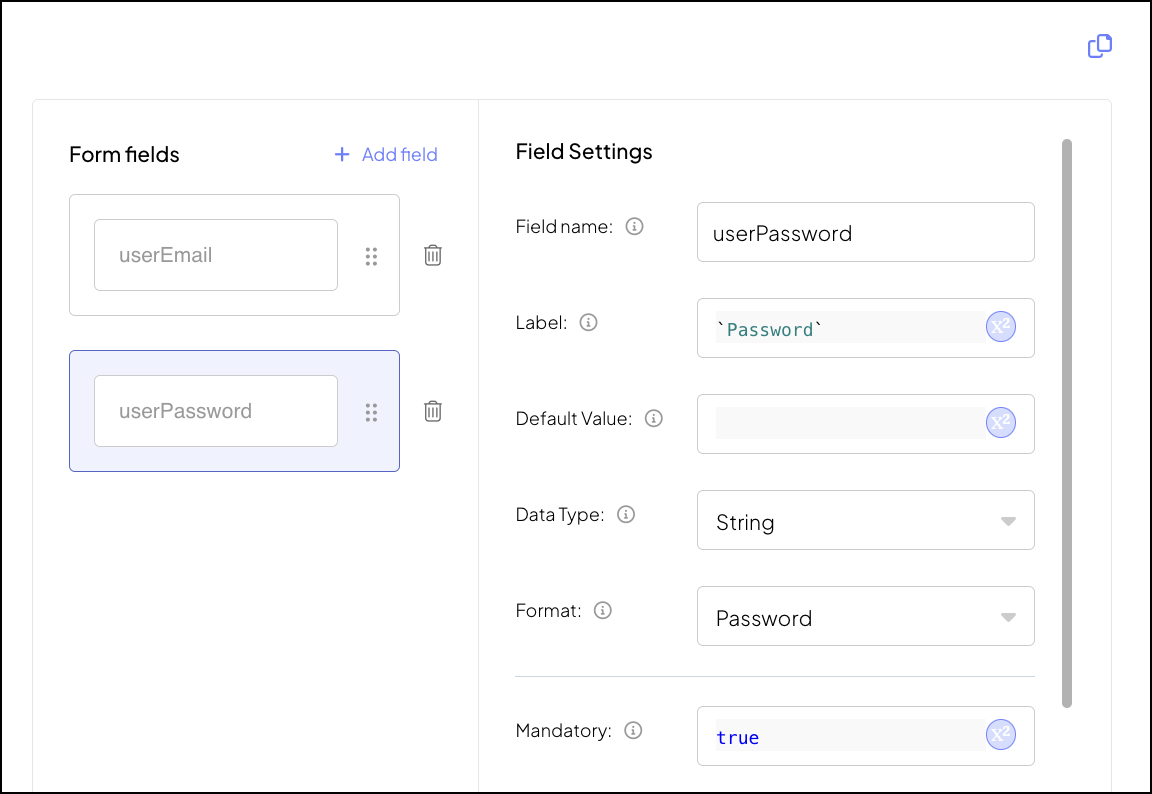
The client will present a form for retrieving this information and return response to the journey. For example:
// If SDK was loaded via script tag, invoke functions inside 'window.tsPlatform'
ido.submitClientResponse(
    ClientResponseOptionType.ClientInput,
    {userEmail: "someone@email.com", userPassword: "MyPass123"}
);This example represents a simple onboarding form where we collect an email, phone number, and password (entered twice). Unlike other fields, the "Phone number" isn't set as mandatory, meaning UI will not enforce the user to fill it.
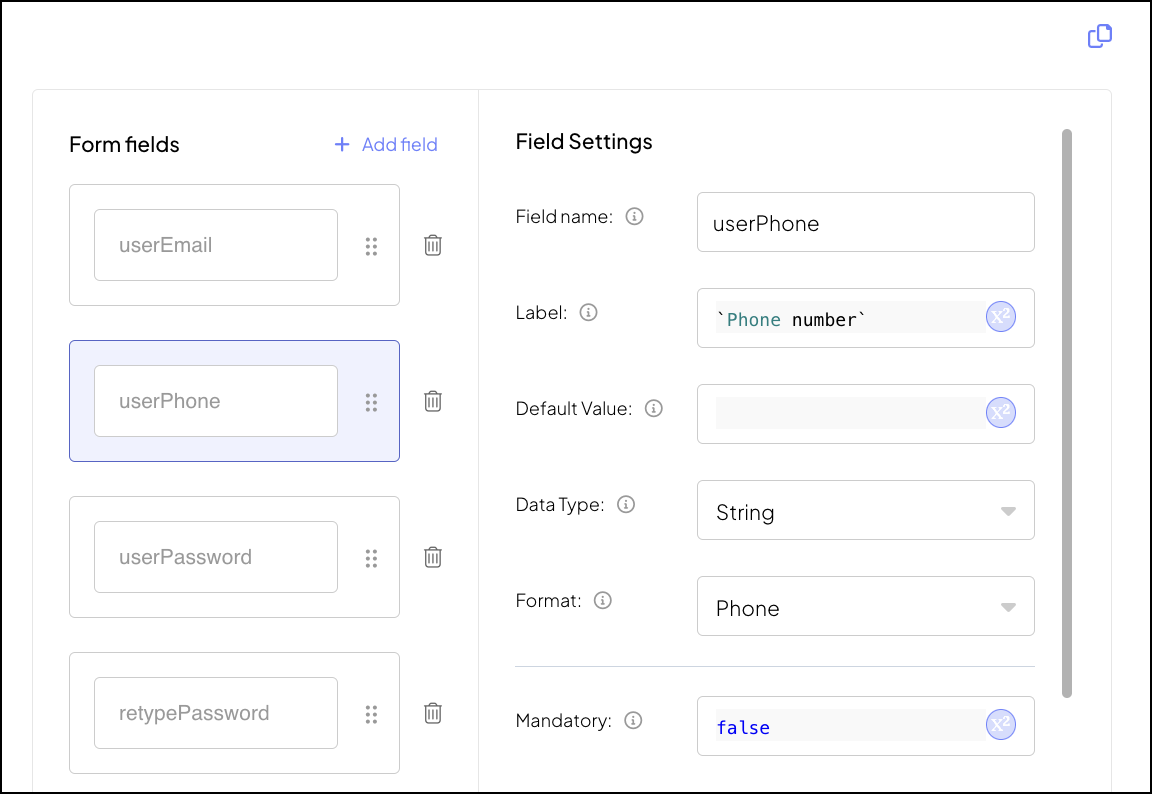
The client will present a form for retrieving this information and return response to the journey. For example:
// If SDK was loaded via script tag, invoke functions inside 'window.tsPlatform'
ido.submitClientResponse(
    ClientResponseOptionType.ClientInput,
    {
      userEmail: "someone@email.com",
      userPhone: "12127001234",
      userPassword: "MyPass123",
      retypePassword: "MyPass123"
    }
);This example represents a form for updating user's personal information. The client side will check if the email address is available for the user (userEmail != null), the client side will prefill it for the user and make this field read-only.
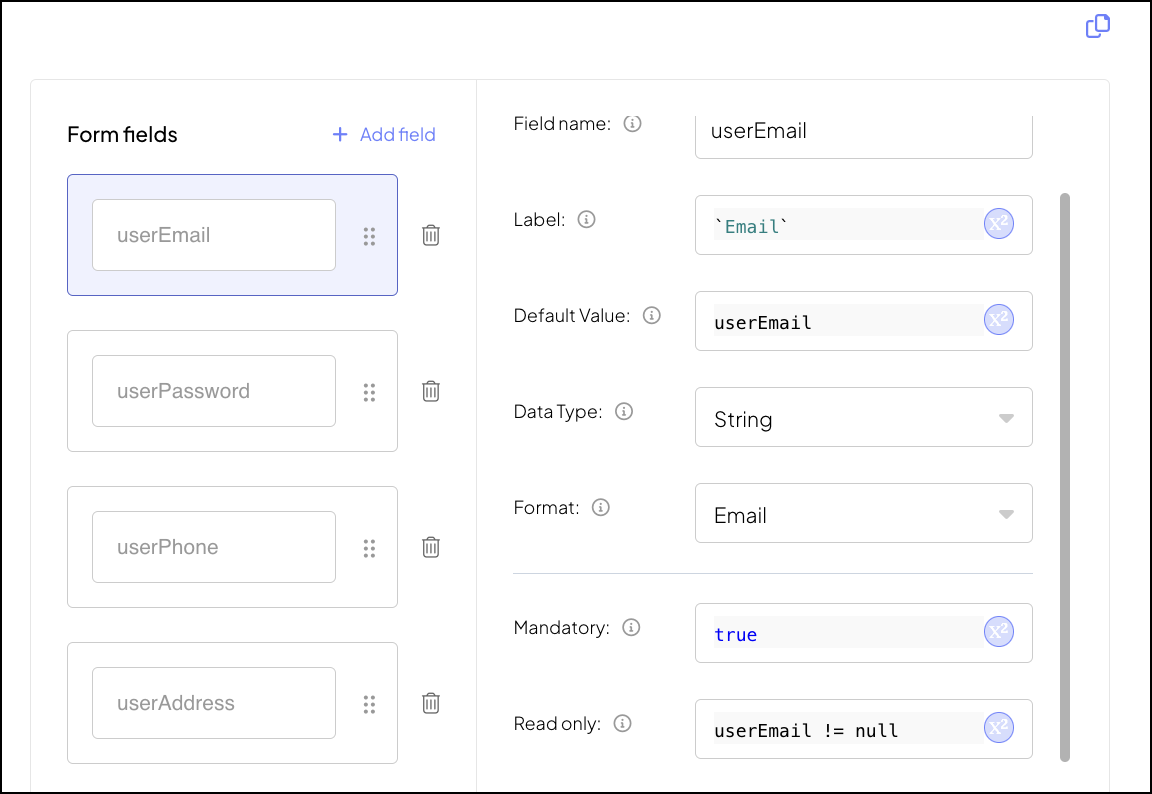
The client will present a form for retrieving this information, prefill the user email (if exists) and return response to the journey. For example:
// If SDK was loaded via script tag, invoke functions inside 'window.tsPlatform'
ido.submitClientResponse(
    ClientResponseOptionType.ClientInput,
    {
      userEmail: "someone@email.com",
      userPhone: "12127001234",
      userPassword: "MyPass123",
      userAddress: "PO Box 1234 Anytown, CA 12345"
    }
);