Interactive demo
Try out backend authentication yourself to see how it works. This demo showcases a backend integration of password authentication and some essential user management tasks. You can run API calls directly from this demo using the built-in API explorer—no actual coding or developer tools are needed.
➊ Create app
To integrate with Mosaic, configure an application in the Admin Portal as shown below. For example:
- Application name: My demo app
- Client name: Demo client
- Redirect URIs:
https://mydemoapp.com/verify. This field is required for all Mosaic apps, but isn't used here.
Upon saving, Client ID and Client Secret are generated automatically. You'll need them for the next step.
➋ Get API token
Start by obtaining a client access token that will be used to authorize all subsequent calls in this demo. To generate a token, insert the Client ID and Secret from Step 1 in the API explorer; the grant type is preset, no need to change it.
How to use API explorer?
- Start by selecting a target server that corresponds to your tenant location: US, Europe, or Canada.
- Expand the Body section and enter values for your request parameters:
client_idandclient_secret.grant_typeis prefilled for your convenience. - Select Send to execute the API call.
- Check out the Response tab to see the results, including the HTTP code and response object.
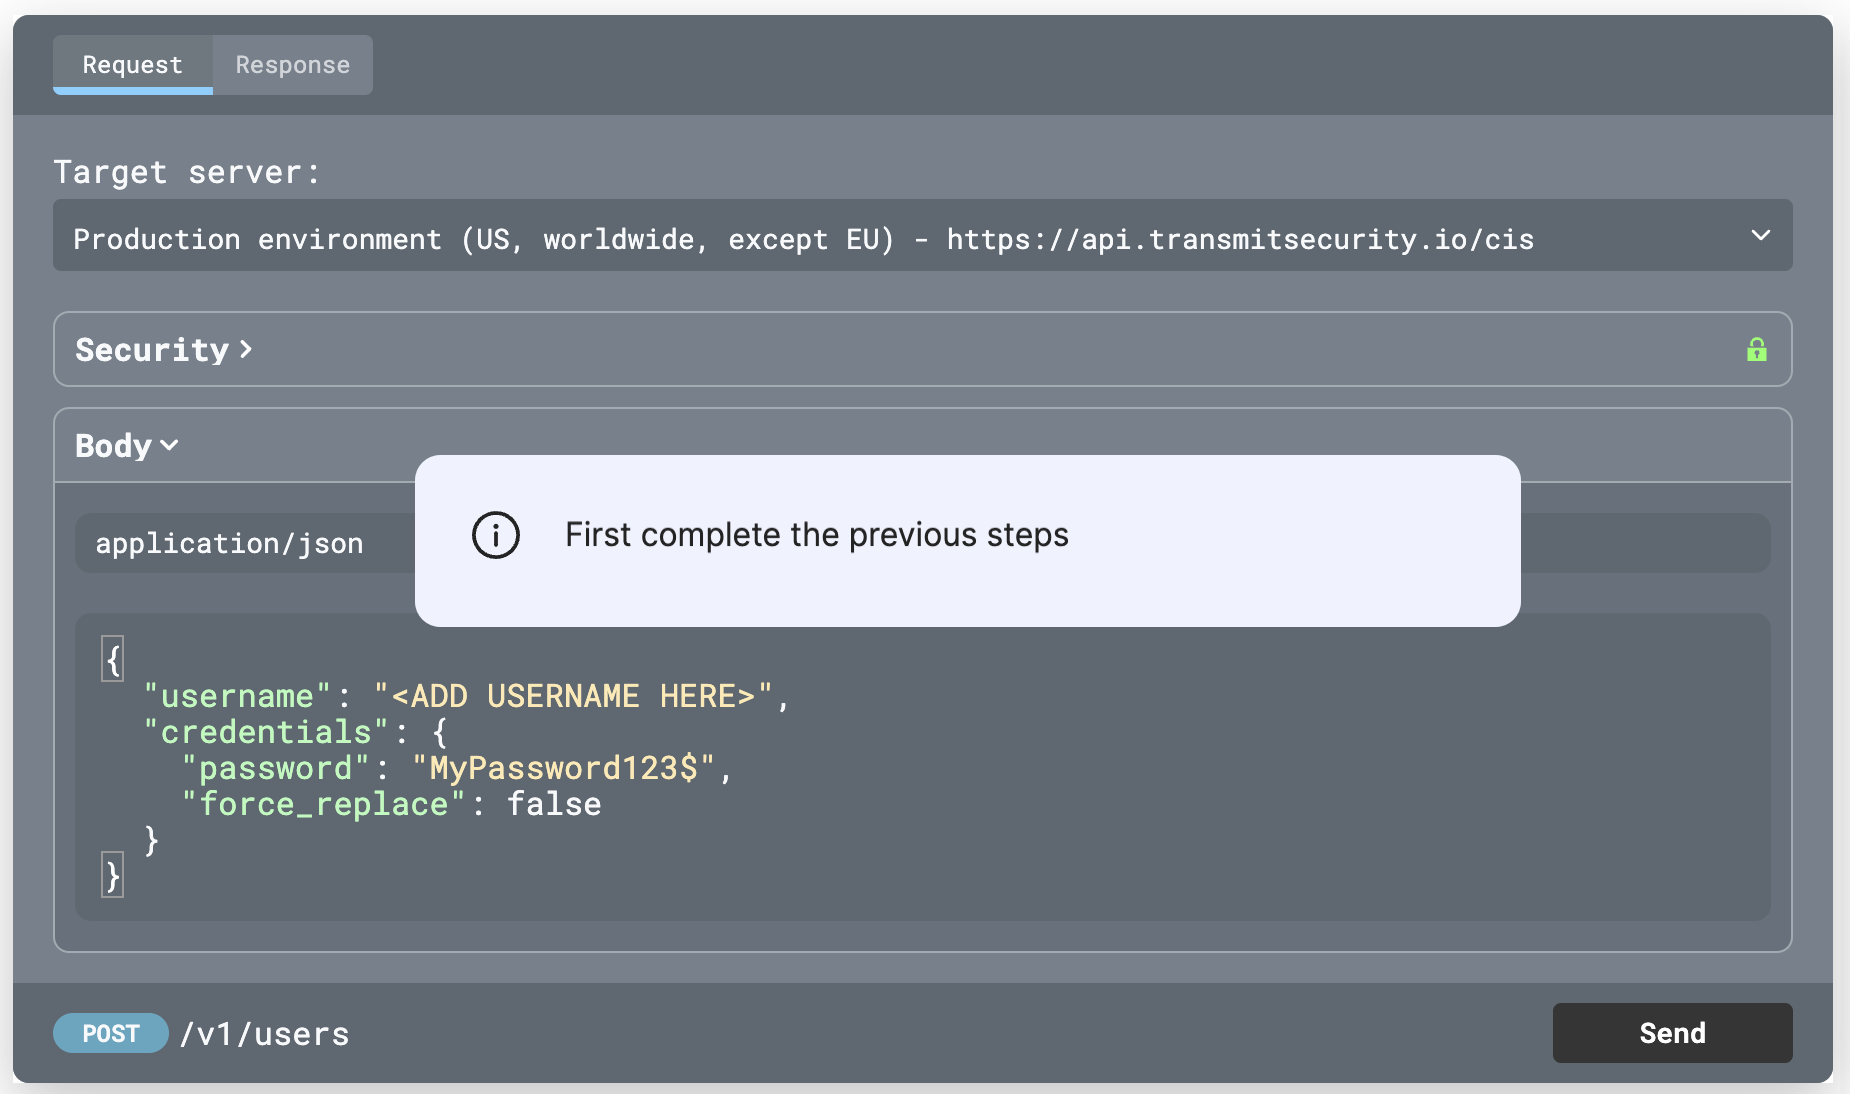
➌ Create user
Before you can login, you'll need to sign up to the app. The request below will create a new user with a password. For simplicity, we've prefilled a password that meets the complexity requirements and set it to non-temporary. All you need to do is enter ausername, which must be unique for the app.How to use API explorer?
- Start by selecting a target server that corresponds to your tenant location: US, Europe, or Canada.
- Notice the lock sign next to the Security section–it has been prefilled with the access token you generated in Step 2.
- Expand the Body section and enter values for your request parameters:
username.credentialspart is prefilled for your convenience. - Select Send to execute the API call.
- Check out the Response tab to see the results, including the HTTP code and response object.
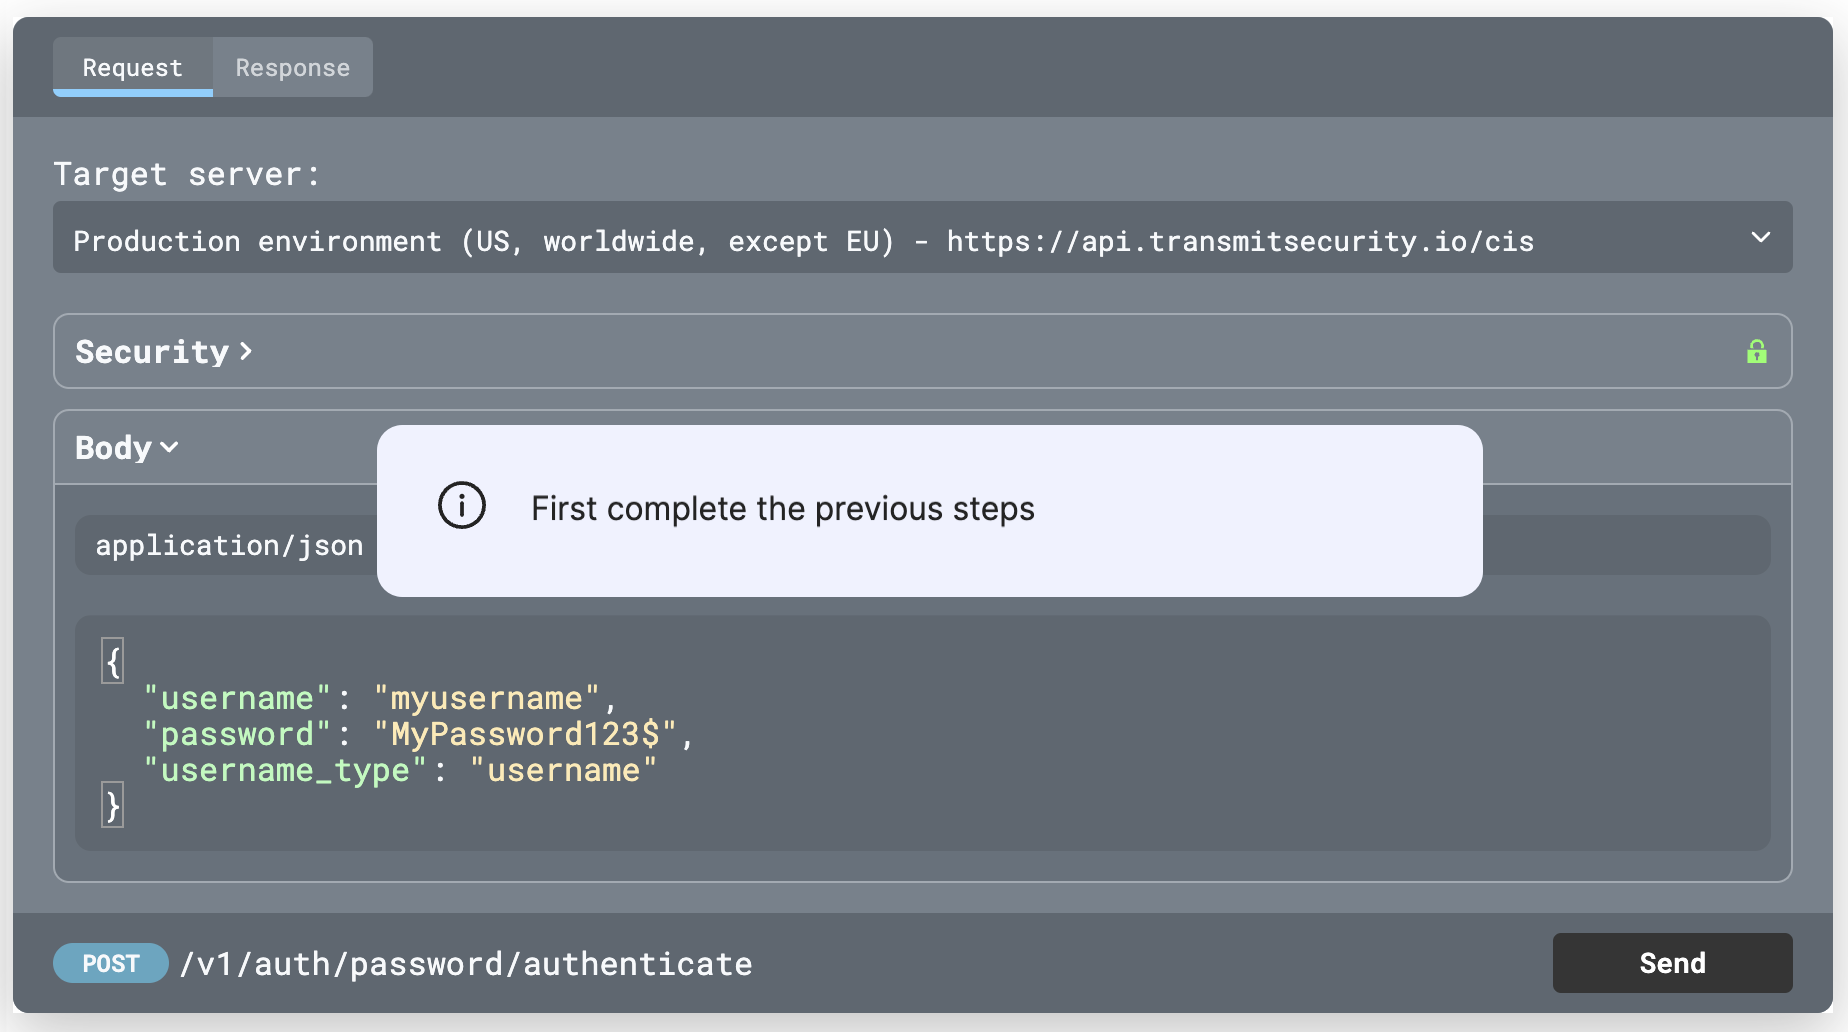
➍ Authenticate
Having created the user, you can proceed to login with username and password. Note that in real integrations, such calls should always run from the backend to avoid password exposure. As you can see, theusername and password are prefilled for you, so you don't need to enter it again. This call returns a user access token and an ID token.How to use API explorer?
- Start by selecting a target server that corresponds to your tenant location: US, Europe, or Canada.
- Notice the lock sign next to the Security section–it has been prefilled with the access token you generated in Step 2.
- Expand the Body section and check the prefilled values.
- Select Send to execute the API call.
- Check out the Response tab to see the results, including the HTTP code and response object.
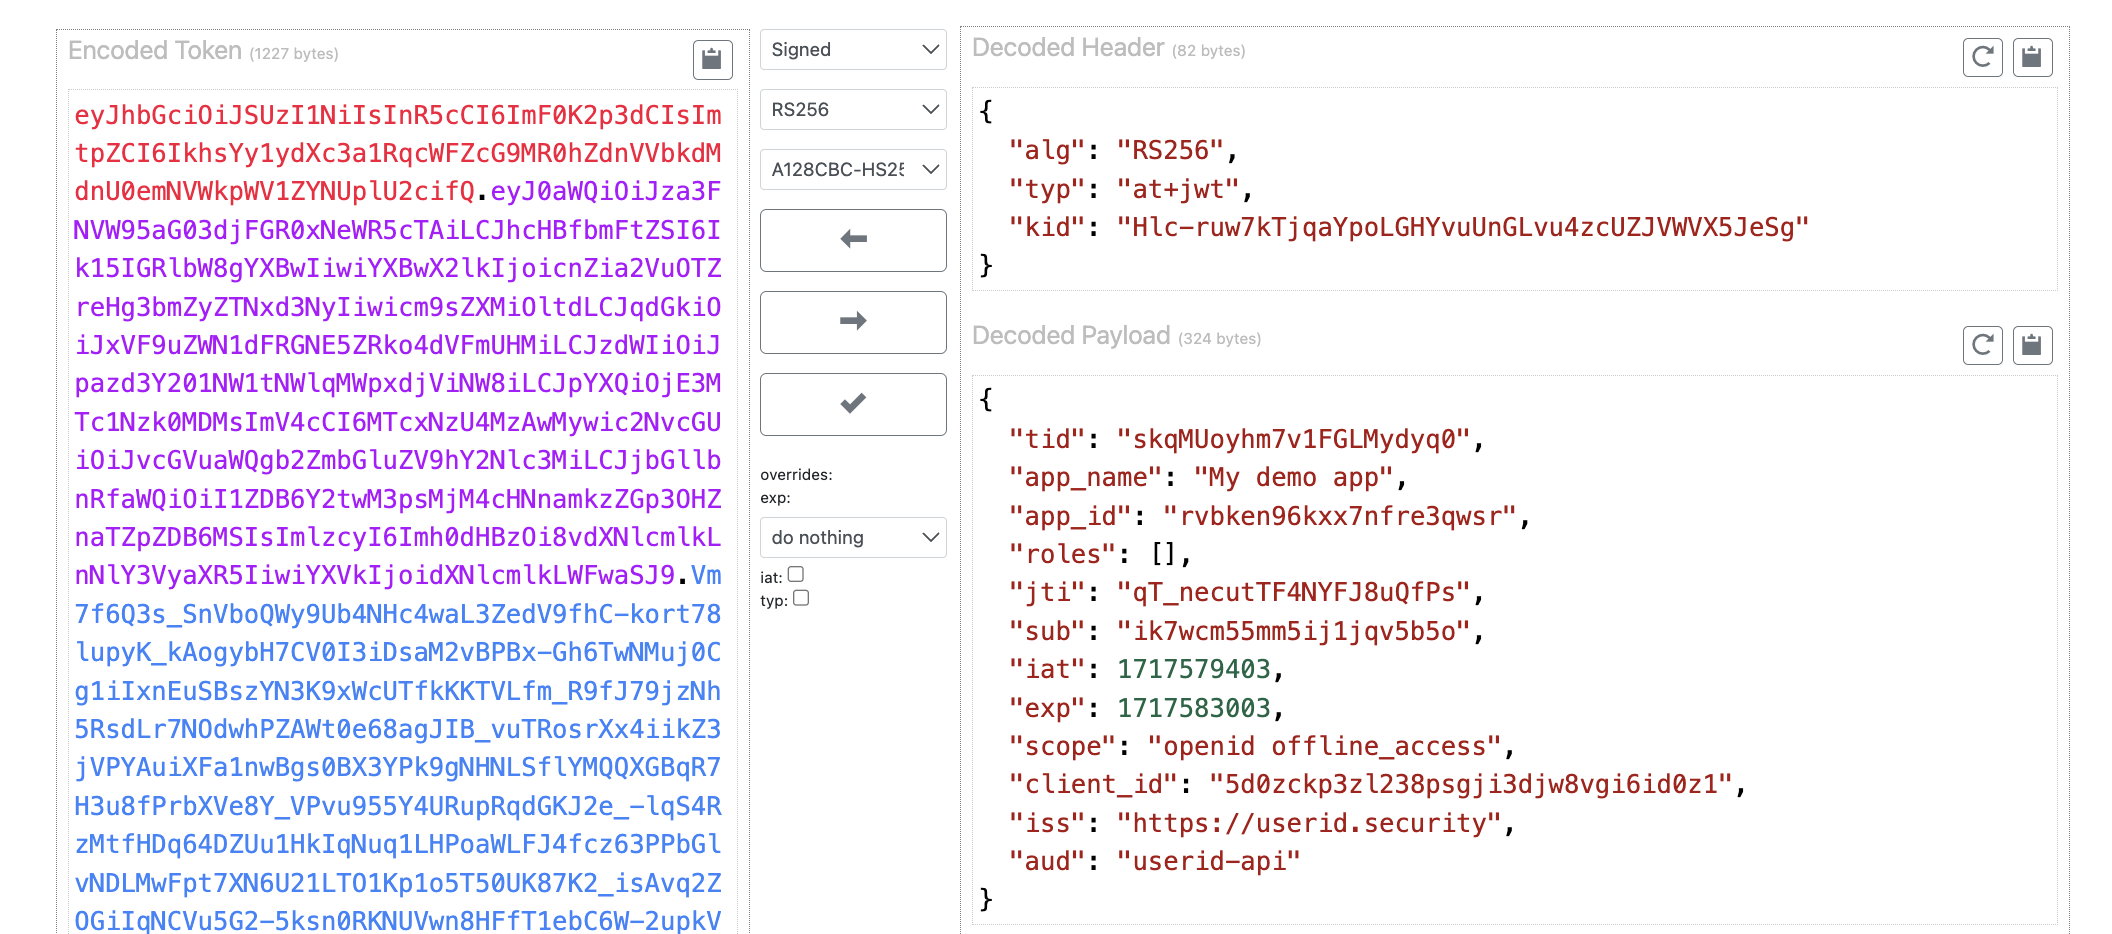
➎ Inspect tokens
Mosaic recommends validating tokens before allowing access to your app resources. Although validation is outside the scope of this demo, let's decode the token to check its structure. Follow the link below and insert the user access token returned in Step 4. Review the decoded token to inspect claims included in this token. Decode token
For example:
➏ View user profile
Having created the user, go to B2C Identity > Users in the Admin Portal to view the user profile. You'll notice that the user's profile matches the data returned in the response in Step 3 and links to your application. For example:
➐ View user activity
Proceed to the Activities tab to see events related to this user. You'll see creating the user, and the login attempt followed by successful authentication.
Next steps
Want to continue playing with our APIs?
Use the API explorer directly from the API Reference by clicking the Try it button. For example, you can fetch your user ID by username here and then update the user details here.
Ready to start?
Here are some ways to get started: