Streamline fraud management and risk mitigation by dividing recommendations on user actions captured by Mosaic into categories and organizing them into lists based on risk recommendations or indicators related to the user, device, and network. With lists, the fraud response team can gain a better understanding of the attack landscape and prioritize reviewing certain types of user actions over others.
For example, depending on your risk assessment workflows, you can create lists for user actions originating in a specific country, lists for sensitive actions (such as login or checkout), or even lists for issues that require manual review.
Lists provide a more organized way to review risk recommendations and quickly access them as each list is grouped by specific criteria or a theme. Unlike traditional filtering, lists are flexible and you can include recommendations into lists as you see fit. On top of that, lists are shared across your team and you can add the same action to multiple lists to facilitate further review and risk mitigation procedures.
To ensure the response team keeps up with reviewing risk recommendations and addressing threats on time, Mosaic sets expiration for items in the list. By looking at the lists, you can see which recommendations should be reviewed now and prioritize your work accordingly. The red sign indicates that some items expire in 7 days or less; the yellow sign is reserved for lists with items expiring within the next 30 days; the gray sign is for lists with items expiring in 60 days. Once expired, items get automatically removed from lists. This can help users finish their tasks and make sure they don’t miss urgent issues before it's too late.
You can create and browse lists in the Admin Portal from Fraud Prevention > Recommendations.
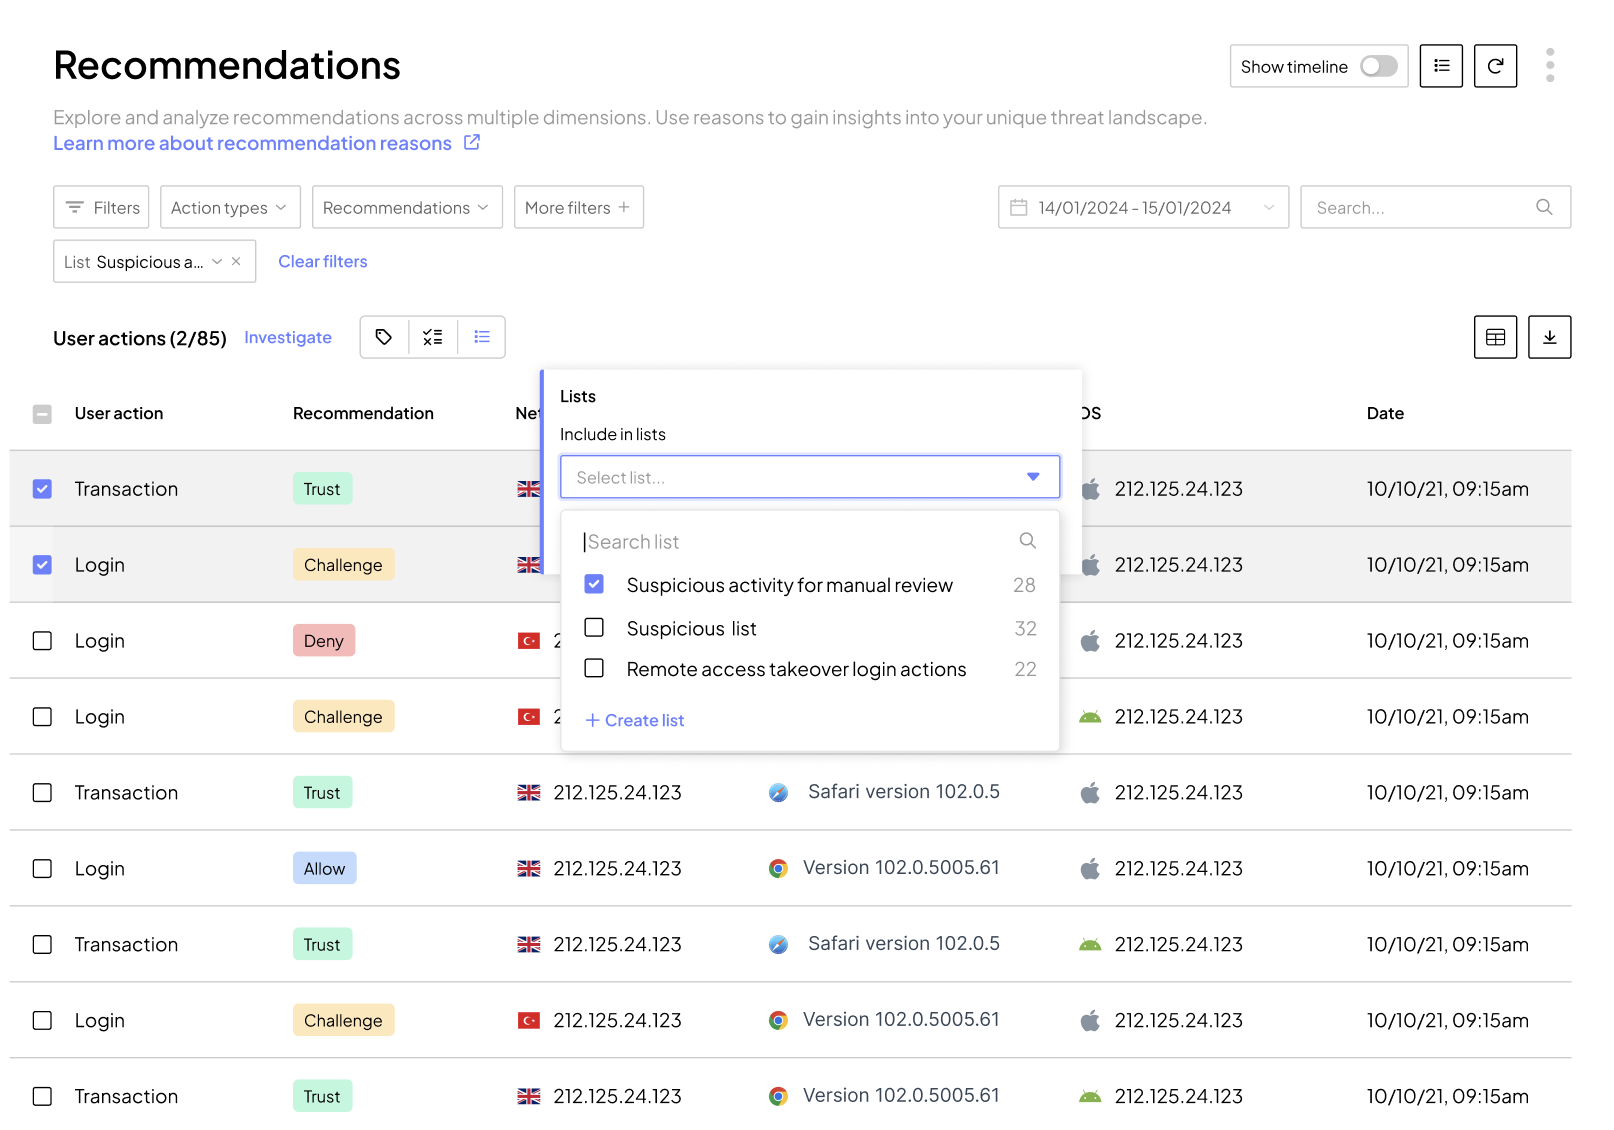
- Create a new list by selecting one or more recommendations in the dashboard and clicking
 > + Create list. Provide a meaningful name for your list.
 - View available lists by clicking
 in the upper-right corner of the screen. You'll see all collaborative lists as well as lists created by you, with the number of items in each list and the date each list was last updated.
 - Change a list name by clicking
 next to its name and then Rename. Unless you are an admin, you can only rename the list you created.
 - Delete a list by clicking next to its name and then Delete. Deleting a list doesn't remove recommendations that were included in this list. Unless you are an admin, you can only delete the list you created.
- Add recommendations to one or more lists by selecting them in the dashboard and clicking , and then specifying the lists. Alternatively, you can add a recommendation to the list when reviewing its details.
- Remove a recommendation from the list by selecting it in the dashboard and clicking , and then clearing the checkbox next to the list name.
- Automatically include recommendations in the list using Automated workflows.
- View the contents of the list by clicking the list name