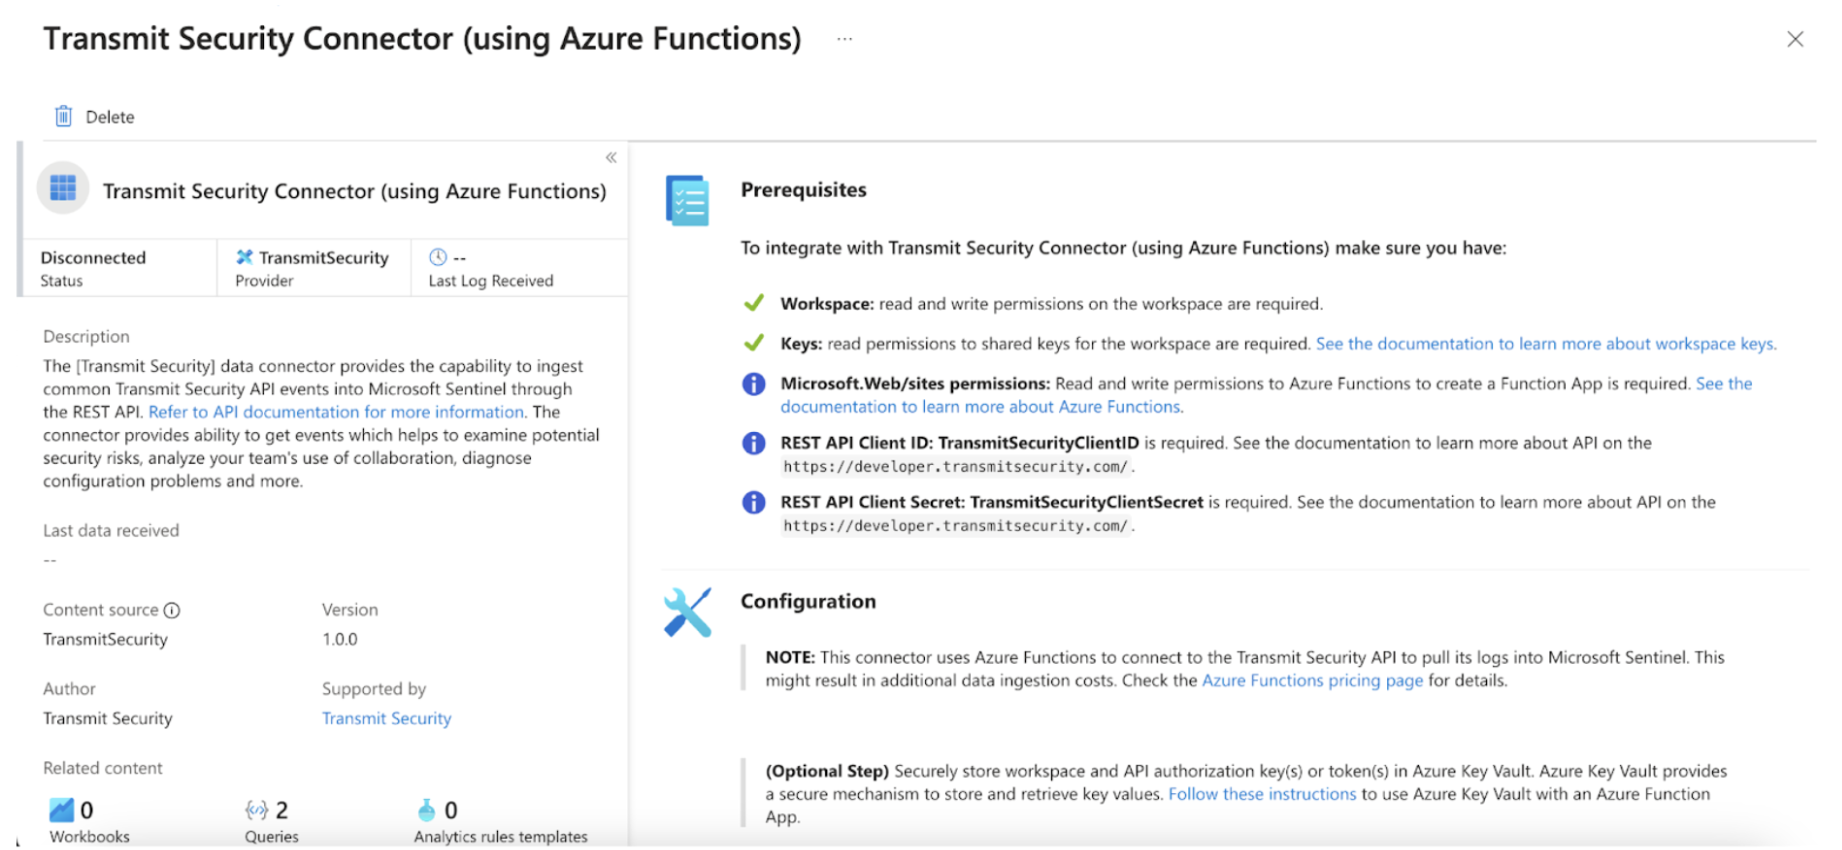
You can feed data to Microsoft Sentinel via Mosaic Data Connector. This plugin will help you keep track of activity by polling Event streaming API.
In your Mosaic tenant, configure a management app. Give the app a suitable name, for example, MyAzureSentinelLogStream.
After saving the management app, open it again and note the Client ID and Client Secret values. You’ll need these parameters to configure the Azure Sentinel Solution.
Before you can start feeding events to Sentinel, you have to create event streams in Mosaic. You can create as many event streams as needed.
- In the Admin Portal, navigate to Events streaming and select Create stream.
- Complete the stream configuration by providing the stream identifier, event type to collect, and batch size. Set the stream destination to Sentinel. For more details, see About events streaming.
- Obtain the request URL by clicking
next to the stream name and then Copy URL.
- Log in to the Azure Portal.
- Navigate to Microsoft Sentinel within your resource group.
- Go to the Content Hub and search for the Mosaic Data Connector.
- Select the solution and click Install.

- Open Microsoft Sentinel in your Azure Portal.
- Navigate to Data Connectors and find Mosaic Security Connector (using Azure Functions).
- Click the Open connector page to begin configuration.
- Follow the provided guide to complete the setup.

Choose one of the following deployment options:
Deploy using Azure Resource Manager (ARM) template
Use this method for automated deployment of the Mosaic connector.
- Click the Deploy to Azure.
- Select the appropriate Subscription, Resource Group, and Location.
- Ensure that the Resource Group doesn't contain any existing Windows apps if deploying in the same region.
- Provide the following parameters:
- TransmitSecurityClientID: Client ID acquired in Step 1
- TransmitSecurityClientSecret: Client Secret acquired in Step 1
- TransmitSecurityUserActivityEndpoint: Provide the URL you obtained upon creating a stream in Mosaic. For example,
https://api.transmitsecurity.io/activities/v1/activities/collect?type=cis&stream_id=12345&batch_size=50. - TransmitSecurityAdminActivityEndpoint: Provide the URL you obtained upon creating a stream in Mosaic. For example,
https://api.transmitsecurity.io/activities/v1/activities/collect?type=admin&stream_id=54321&batch_size=50. - logAnalyticsUri: Obtained from Log Analytic Workspace > Properties
- Agree to the terms and conditions, then select Create to deploy.
If you are interested in collecting all platform events, you'll have to set up several connectors as you can only feed events from two streams to each connector.
Deploy with Azure Functions
Follow these steps for a manual deployment via Visual Studio Code.
1. Deploy a Function App
- Make sure you have VS Code up&running.
- Download and extract the Azure Function App file to your local computer.
- In VS Code, open the extracted folder.
- In the Activity Bar, select the Azure icon, then click Deploy to Function App.
- If not signed in, sign in to Azure.
- Provide the required information:
- Select Folder: Choose the folder containing your Function App.
- Select Subscription: Choose your Azure subscription.
- Function App Name: Enter a globally unique name.
- Runtime: Choose Python 3.8.
- Location: Select the same region as your Microsoft Sentinel for better performance.
After completing these steps, deployment will begin, and you’ll be notified once it’s done.
2. Configure the Function App
- In the Azure Portal, navigate to your Function App.
- Select Configuration under your Function App Name.
- Add the following environment variables with their respective values:
- TransmitSecurityClientID: Client ID acquired in Step 1
- TransmitSecurityClientSecret: Client Secret acquired in Step 1
- TransmitSecurityUserActivityEndpoint: Provide the URL you obtained upon creating a stream in Mosaic. For example,
https://api.transmitsecurity.io/activities/v1/activities/collect?type=cis&stream_id=12345&batch_size=50. - TransmitSecurityAdminActivityEndpoint: Provide the URL you obtained upon creating a stream in Mosaic. For example,
https://api.transmitsecurity.io/activities/v1/activities/collect?type=admin&stream_id=54321&batch_size=50. - TransmitSecurityTokenEndpoint:
https://api.transmitsecurity.io/oidc/token(useapi.eu.transmitsecurity.iofor the EU andapi.ca.transmitsecurity.iofor Canada). - WorkspaceID: Obtained in Step 4 from the Data Connector page
- WorkspaceKey: Obtained in Step 4 from the Data Connector page
- logAnalyticsUri (optional for dedicated cloud environments): Obtained from Log Analytic Workspace > Properties
- Click Apply to save the settings.
If you are interested in collecting all platform events (cis, verify, risk, and admin), you'll have to set up several connectors as you can only feed events from two streams to each connector.
- Go to Log Analytics in your Azure Portal.
- Run the following query to check for ingested data:
TransmitSecurityAdminActivity_CL | where TimeGenerated > ago(1h)
TransmitSecurityUserActivity_CL | where TimeGenerated > ago(1h)If no logs are found, ensure the Data Connector is configured correctly and that the Client ID and Client Secret values are accurate. You can also inspect the Azure Functions invocations logs for errors.