Email OTPs can be sent to users in order to verify their email address. For example, this can be used to enrich the profile of existing users that are already logged in. Once the email verification is completed, the email address will be added to the user profile and marked as verified. Unlike the authentication flows, users will not be authenticated (or created) and no tokens will be returned.
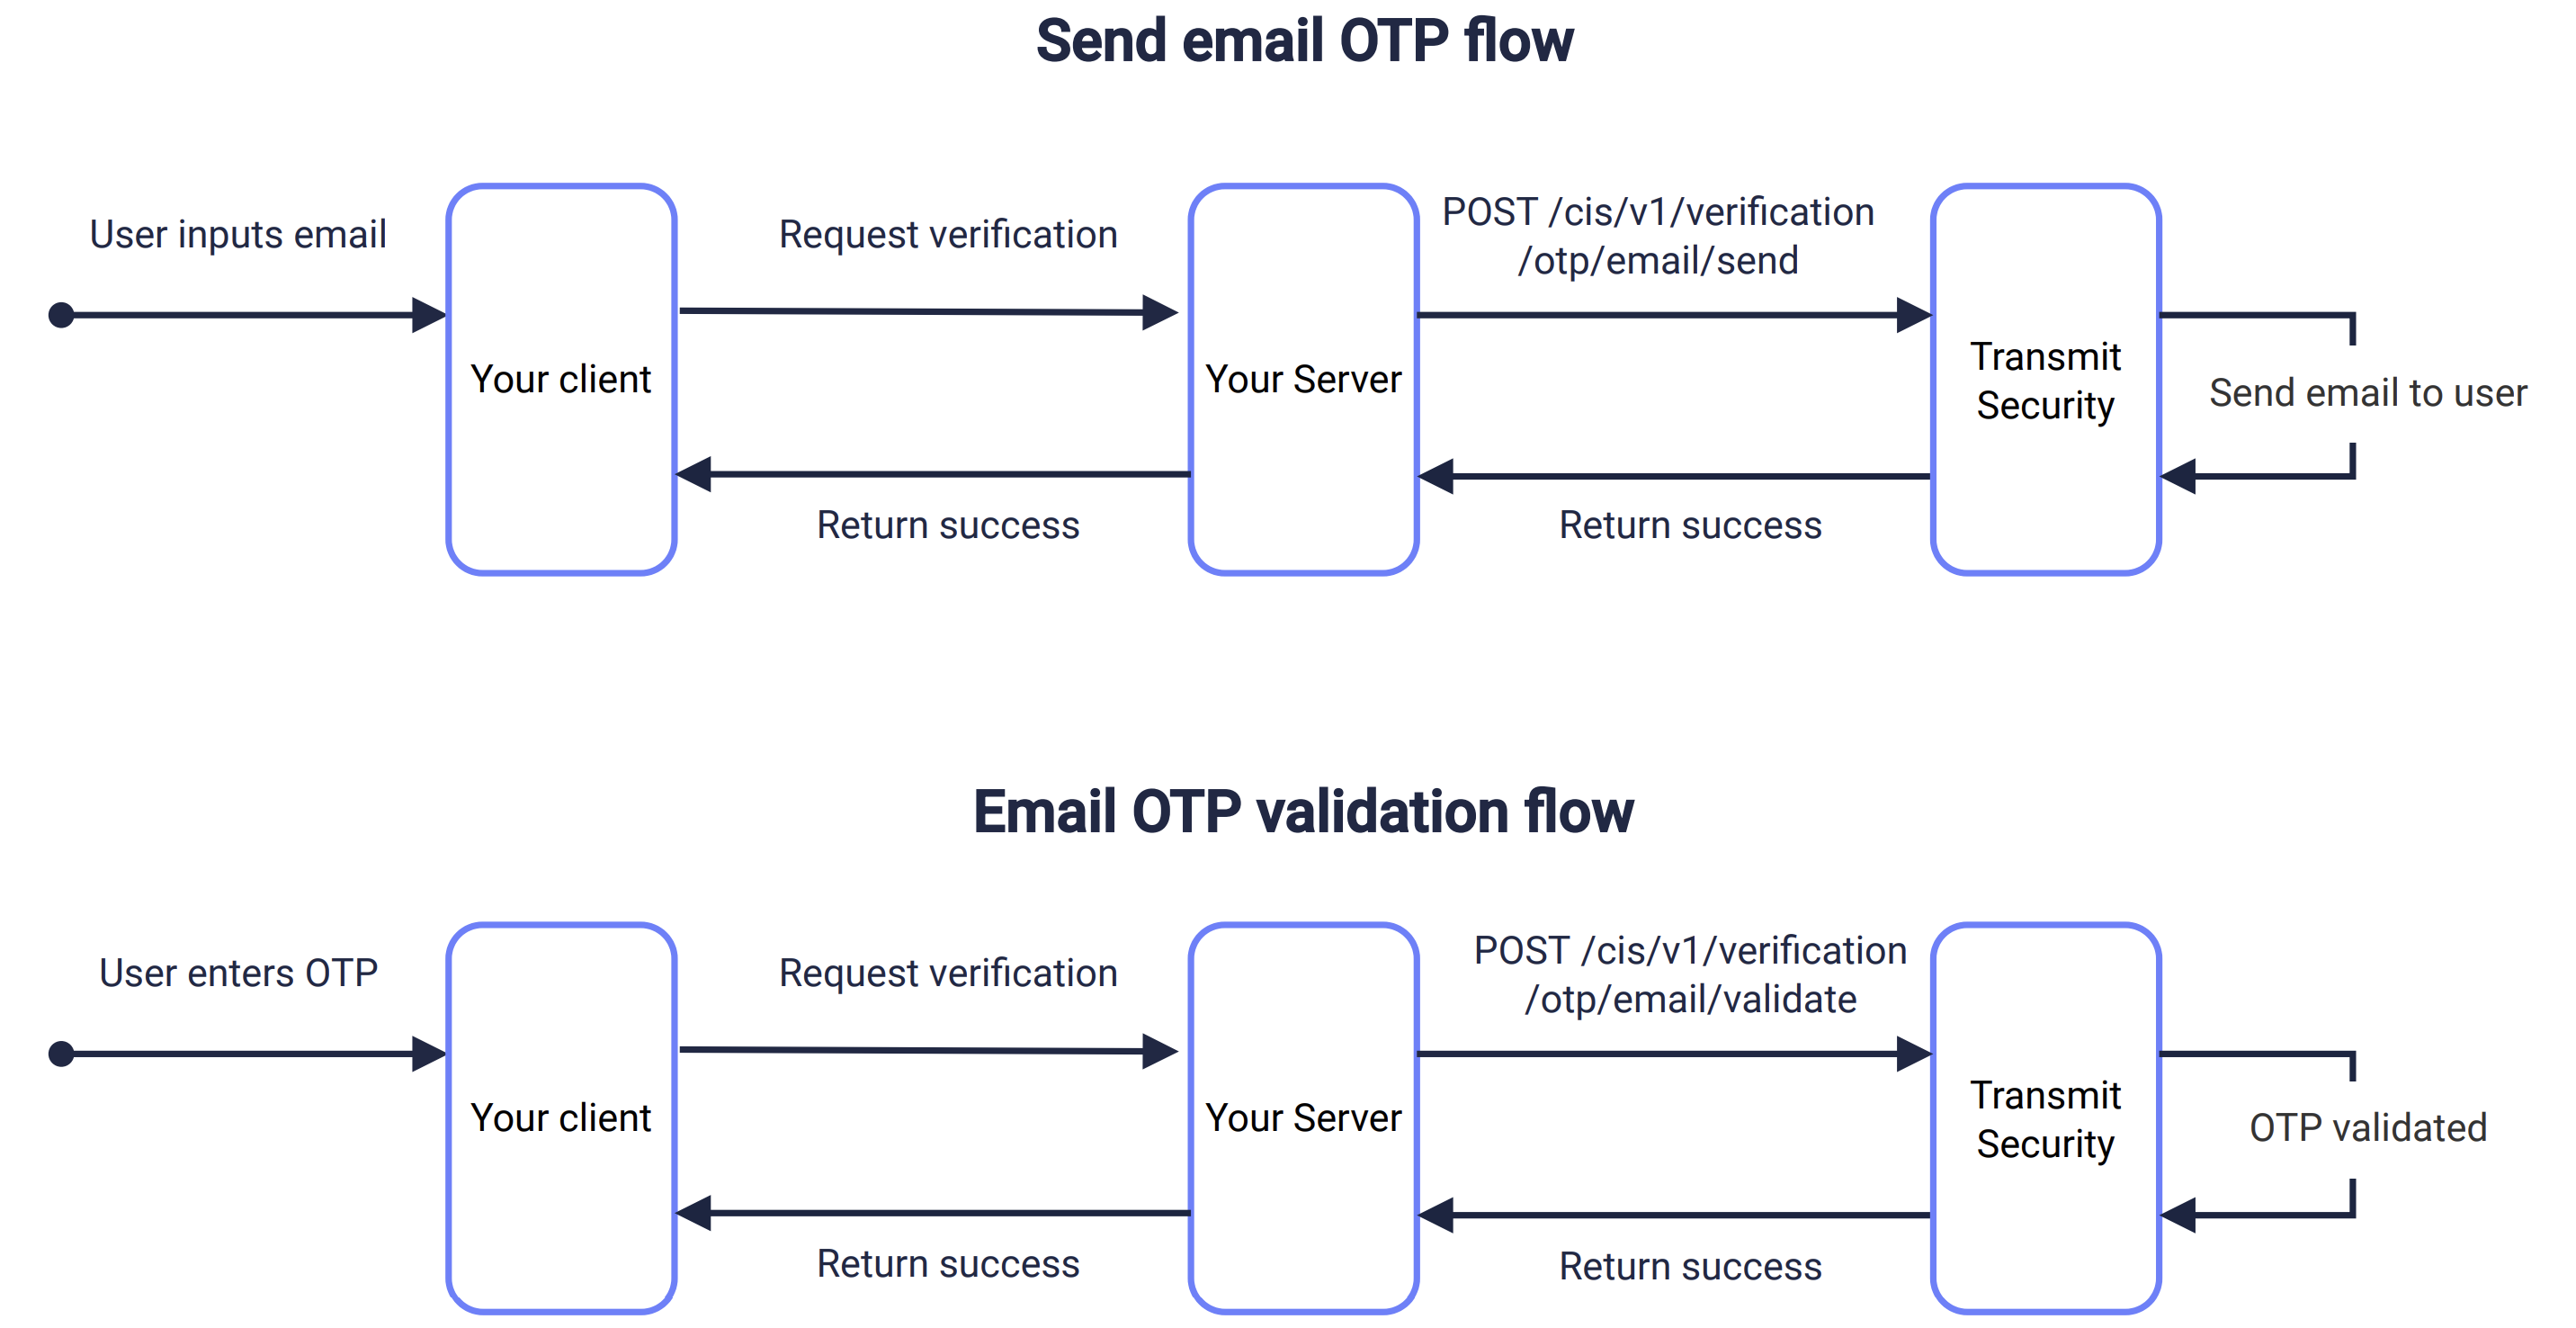
Use a send request like the one below to send the email OTP to the specified email address for a given user. Set method to otp to send a one-time passcode. This flow is described in the sequence diagram above.
Make sure you have a valid client access token to authorize the request. The user_id path parameter identifies the user whose email is being verified.
curl -i -X POST \
  https://api.transmitsecurity.io/cis/v1/users/{user_id}/email/verification/send \
  -H 'Authorization: Bearer CLIENT_ACCESS_TOKEN' \
  -H 'Content-Type: application/json' \
  -d '{
    "method": "otp",
    "email": "name@example.com"
    }'
If you want to customize the email, see Next steps.
Validate the email OTP entered by the user using a validation request like the one below. Once validated, the email address will be added to the user profile and marked as verified. The user won't be authenticated (or created) and no tokens will be returned.
To update the user's primary email, pass update_primary as true. If the user already has a verified primary email, it will be overridden; otherwise, the new email will be added as a secondary email.
curl -i -X POST \
  https://api.transmitsecurity.io/cis/v1/users/{user_id}/email/verification/verify \
  -H 'Authorization: Bearer CLIENT_ACCESS_TOKEN' \
  -H 'Content-Type: application/json' \
  -d '{
    "email": "name@example.com",
    "passcode": "<PASSCODE>"
}'Once you've completed a basic integration, here are some customizations you can consider:
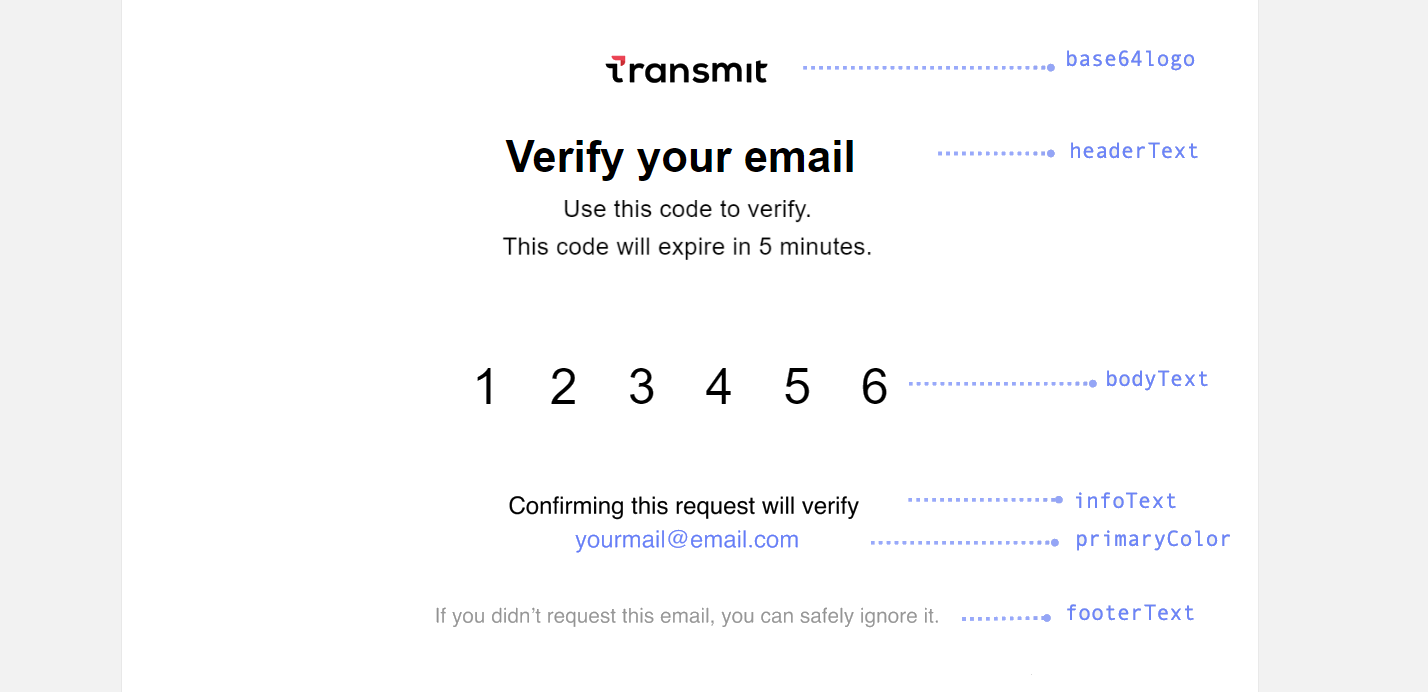
The default email template can be customized either from the Admin Portal or via API (but not both).
From the Admin Portal (B2C or B2B Identity based on your setup > Authentication methods > One Time Passcodes), you can customize the subject, text and appearance of the email containing the OTP. The email message will use the application's logo and name. See the screenshot below for the default texts.
To customize the email content, use the email_content object in the send request, for example:
curl --request POST \
  https://api.transmitsecurity.io/cis/v1/users/{user_id}/email/verification/send \
  -H 'Accept: application/json' \
  -H 'Authorization: Bearer CLIENT_ACCESS_TOKEN' \
  -H 'Content-Type: application/json' \
  -d '{
    "method": "otp",
    "email": "user@email.com",
    "email_content": {
        "subject": "Verify",
        "primaryColor": "#6981FF",
        "base64logo": "data:image/png;base64,iVBORw0KGgoAA...XEzGmCC",
        "headerText": "Verify your email",
        "bodyText": "Use this code to verify. This code will expire in 5 minutes.",
        "infoText": "Confirming this request will securely verify your email",
        "footerText": "If you didn'\''t request this email, you can safely ignore it.",
        "senderName": "My App"
    }
}'If you pass the email_content object, all the email branding will be taken from there and the default template won't be used at all. This means that if a field is not specified, it will be treated as empty.
Here's a screenshot of the email verification template with its customizable field names:
From the Admin Portal ( B2C or B2C Identity based on your setup > Authentication methods > One-time passcodes), you can configure the OTP policy for your app:
- Expiration time: set the OTP expiration period in minutes.
- Failed attempts lockout policy: set the number of failed login attempts that trigger a temporary user lockout and specify the lockout duration in minutes.
- Code length: set the length of the one-time code.
Make sure to apply the changes to the relevant application by selecting it from the top of the page.