In Mosaic, you can view a complete list of verifications initiated by your app (Admin Portal > Identity Verification > Verifications) and drill down into each session to see details specific to the user interaction.
Start analysis by reviewing verification sessions processed by Mosaic. Here you'll see the total number of verifications, and specifically the number of failed verifications (denied and challenged). This dashboard provides details on the number of user verifications your apps handled within a given time frame and verification results.
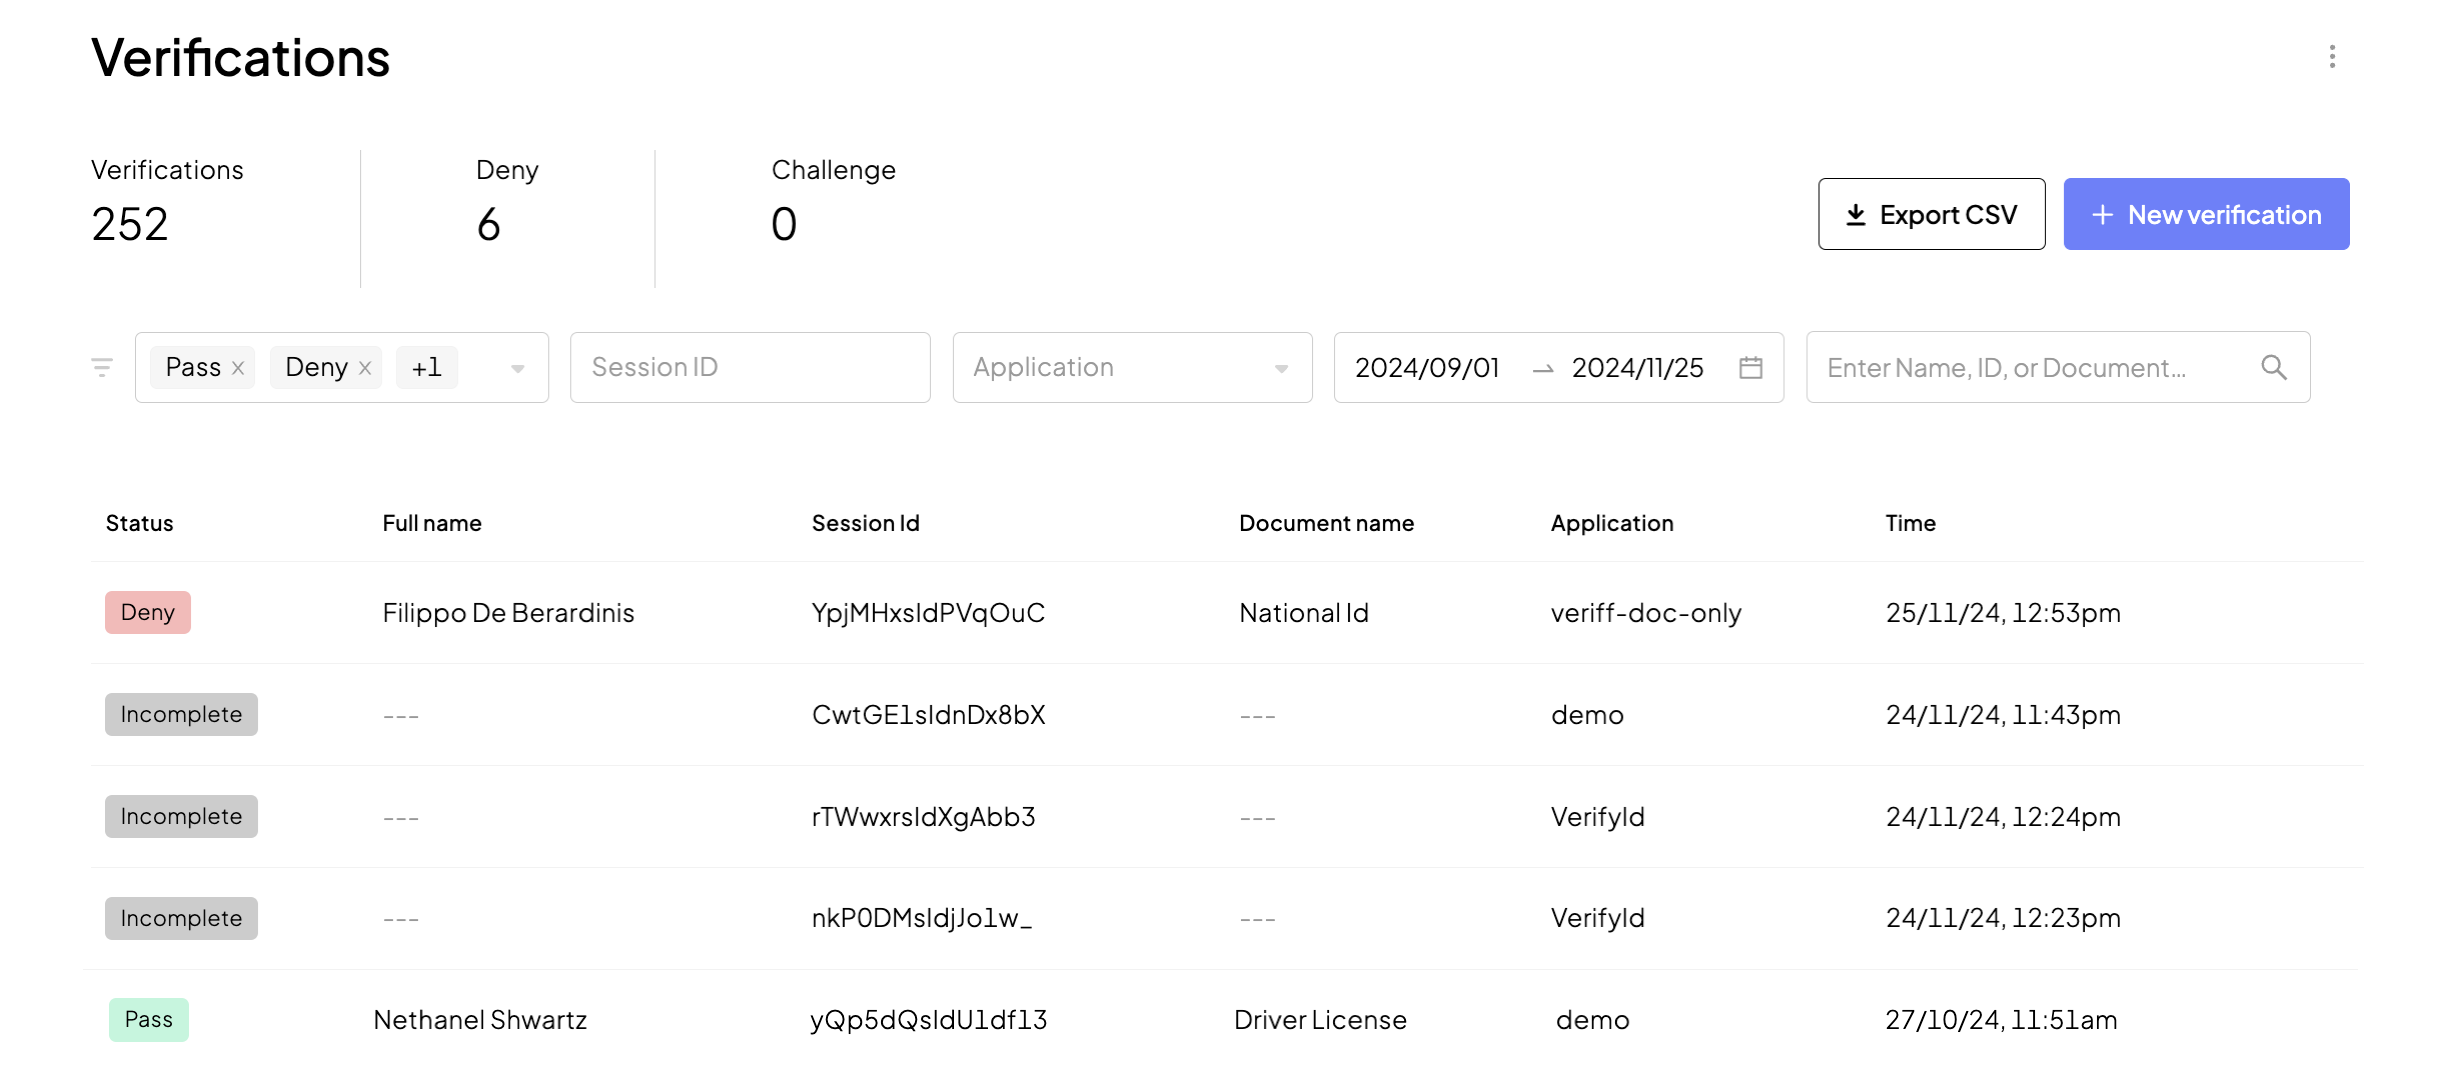
When filtering verifications by date, the maximum date range is 30 days.
In the list, you can see all verifications, with status, session ID, user name and document type (if known), application name, label (if assigned), and the date for each verification. Filter verifications by status, label, date, etc. You can also export the verifications to your external analytics systems for further persistency and offline analytics.
Before diving into verification reports, you first have to understand the verification statuses available in the Admin Portal:
| Status | When returned |
|---|---|
| Incomplete | Verification wasn't completed. For example, a user uploaded a document photo but didn't submit a selfie. |
| Pass | Verification completed with the Allow recommendation. |
| Deny | Verification completed with the Deny recommendation. |
| Error | An unexpected technical error occurred (e.g., communication error). |
To learn more about a specific verification and user identity, proceed to a verification report. The report is organized in a way that allows a holistic view of user interaction and identity verification results. Right on top, you can see high-level information such as a verification session ID, date, and the user's full name (if they submitted a document). Additionally, Mosaic provides details about the app that handled the verification, the organization, and the external user ID (if known).
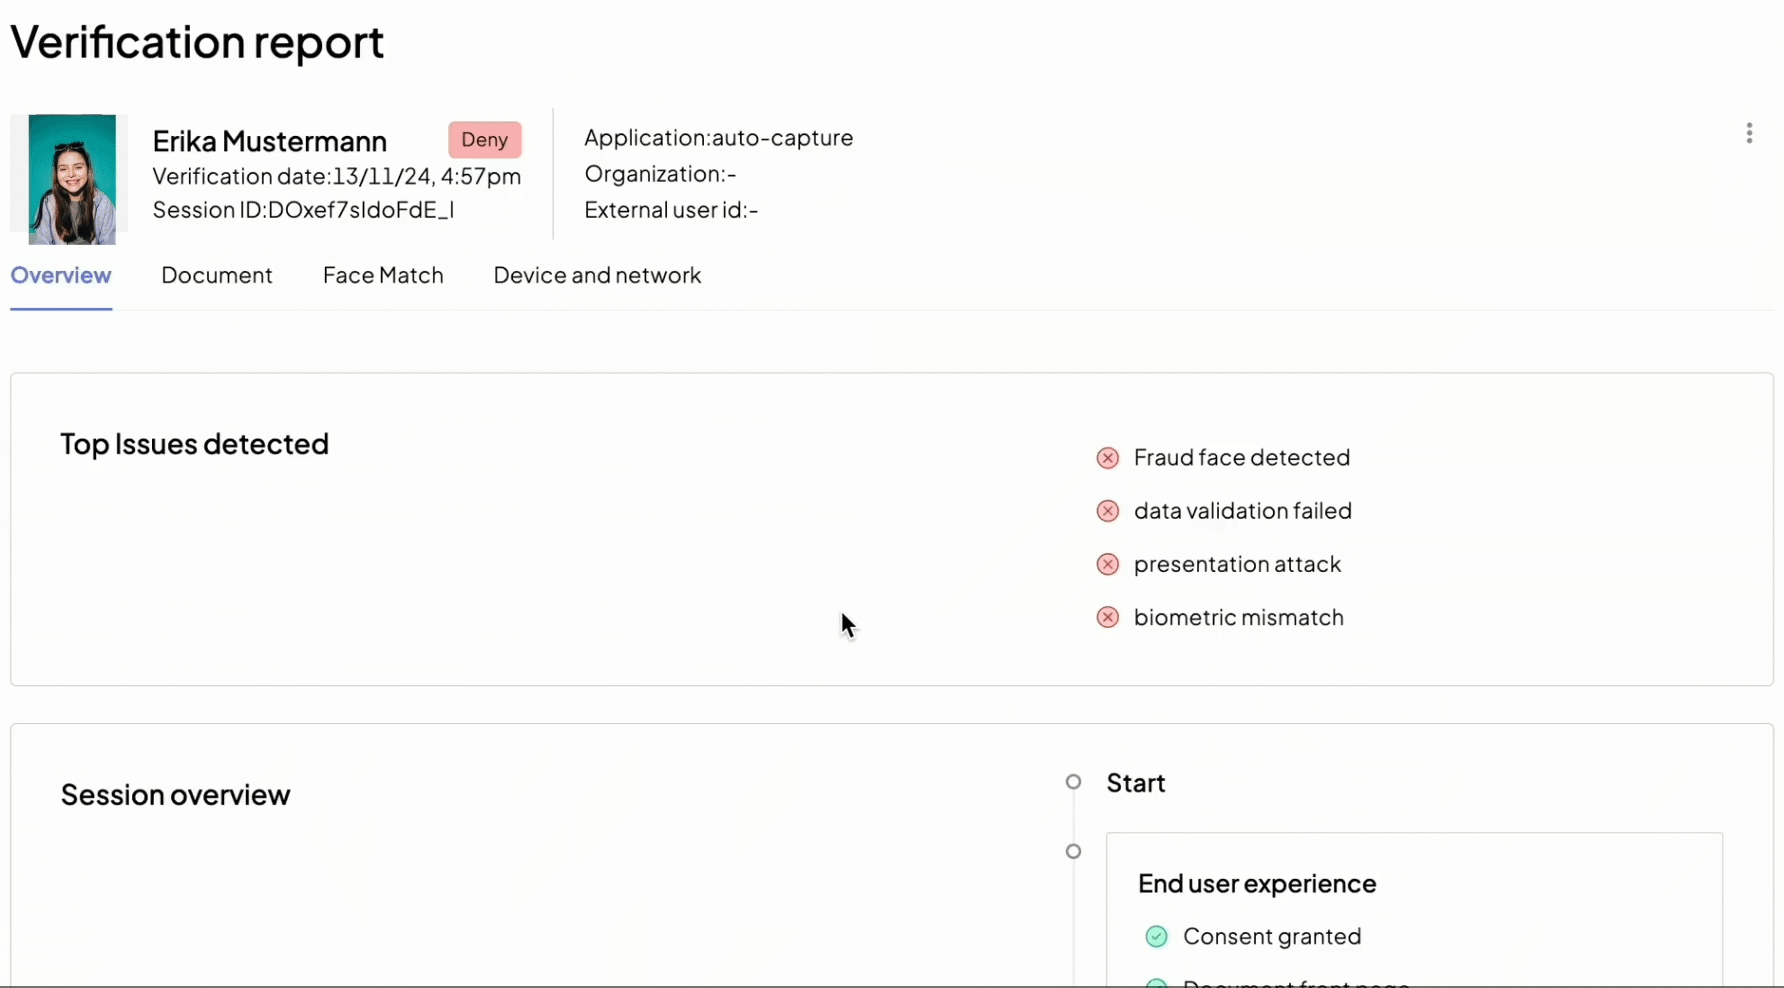
The Overview tab covers completed checks and issues, including:
Top detected issues for denied verifications, for example, "biometric mismatch" or "fraud face detected".
Session overview provides insight into every stage of the verification process: Start, End user experience, Document process, Face match process, Flagged identity, Device and network. You can see what checks were performed and the result of each check. For example, the user uploaded a document and a selfie—these are marked with a check symbol in the End user experience section. During the Document process, if a document validation fails, you'll see an error symbol next to it.
The Document tab contains data extracted from the submitted document, such as a document type, country, person's full name, gender, and date of birth. Here you can also see the document picture. Additionally, this tab lists document-specific checks made by Mosaic with respective results. For example, document authentication checks allow detecting tampered documents with manipulated images and other alterations.
The Face match tab (available only for flows that include capturing a selfie) contains a selfie captured by the user, with recommendations on the liveliness, face match status. Additionally, this tab lists selfie-specific checks made by Mosaic with respective results. For example, liveliness checks allow detecting if the photo was taken of a live person and not a static image or video.
The Device and network tab provides insights into risk assessment and displays the recommendation issued along with the risk score. You can see more details about the user interaction such as the network, timezone, and device used. This data is provided by Mosaic Fraud Prevention services—follow the link in the General section to see the full recommendation record.
Labeling is optional, but supports continuous improvement in fraud detection accuracy.
Use labeling to provide feedback on verification sessions. Labeling allows operational teams to label verification sessions and create a real-time feedback loop that improves fraud decisions and system accuracy.
Labels help track false positives and false negatives for internal assessment (for example, Known Fraud for sessions confirmed as fraudulent and Known Legit for sessions confirmed as legitimate). Labeling does not affect the outcome of the current session. Over time, labeled sessions contribute to risk adjustment and continuous accuracy improvement.

After you apply a label, it appears in the verification page header and in the verification list, and the session becomes filterable by label.
Once a label is applied to a session, you cannot modify or delete it.
From a verification report, click Set label to open the labeling form. The form includes setting a label type, specifying the issues observed during verification, and optionally the fraud use case and source.
(Mandatory) You can add a label while reviewing each verification session:
- Known Fraud — Flag a session as confirmed to involve fraudulent activities.
- Suspected Fraud — Flag a session as suspected of fraudulent behavior that has not yet been confirmed.
- Known Legit — Flag a session as confirmed to be legitimate and not involved in fraud.
(Optional) Specify the issues that apply to the session:
Document process
- Document validation — Date out of context, data comparison issues, etc.
- Document authenticity — Portrait tampered, document MRZ font, or other elements not aligned with the original document
- Document liveness — Picture-of-picture analysis (photo taken of a photo)
- Manipulated or synthetic sample
Face match process
- Biometric matching — Problems comparing selfie and portrait
- Biometric liveness — Picture-of-picture analysis (photo taken of a photo)
Flagged identity
- Block list discrepancies — Problems comparing selfie against block list images
- Multi-session detections — Issues identified across multiple sessions
(Optional) Indicates how you learned about the issue that led to the label:
- Manual Review — You identified the issue while reviewing the verification in the Admin Portal.
- Customer Complaint — A customer reported the issue (e.g., wrongly denied or concern about a session).
- Other Vendor — The issue was flagged by a third-party tool or data provider integrated with your system.
You can build additional business logic or enforce various security policies based on the verification report and its status. For example, you can:
- Block a person — By adding a known fraudster to a face blocklist you enforce a policy that denies any identity verifications they attempt in the future, even if they use a different name or document.
- Delete a verification session — This might be helpful if you have large numbers of incomplete sessions or if you want the user to complete another verification procedure.