This page illustrates the SSO Service configuration, which involves designing SSO journeys, configuring OIDC or SAML clients and grouping them based on their assigned SSO journey.
The SSO authentication process begins when a user requests to log in from your client application. This triggers a redirection to a dedicated SSO experience, which can be hosted either by you or by Mosaic. Set the SSO experience URL in SSO and Federation > Configuration.
- For a self-hosted SSO experience, enter the relevant URL. You will have full control over the page's appearance and customization.
- For a Mosaic-hosted experience, enter the appropriate URL based on your location:
- US and Global:
https://sso-app.transmitsecurity.io - CA:
https://sso-app.ca.transmitsecurity.io - EU:
https://sso-app.eu.transmitsecurity.io
- US and Global:
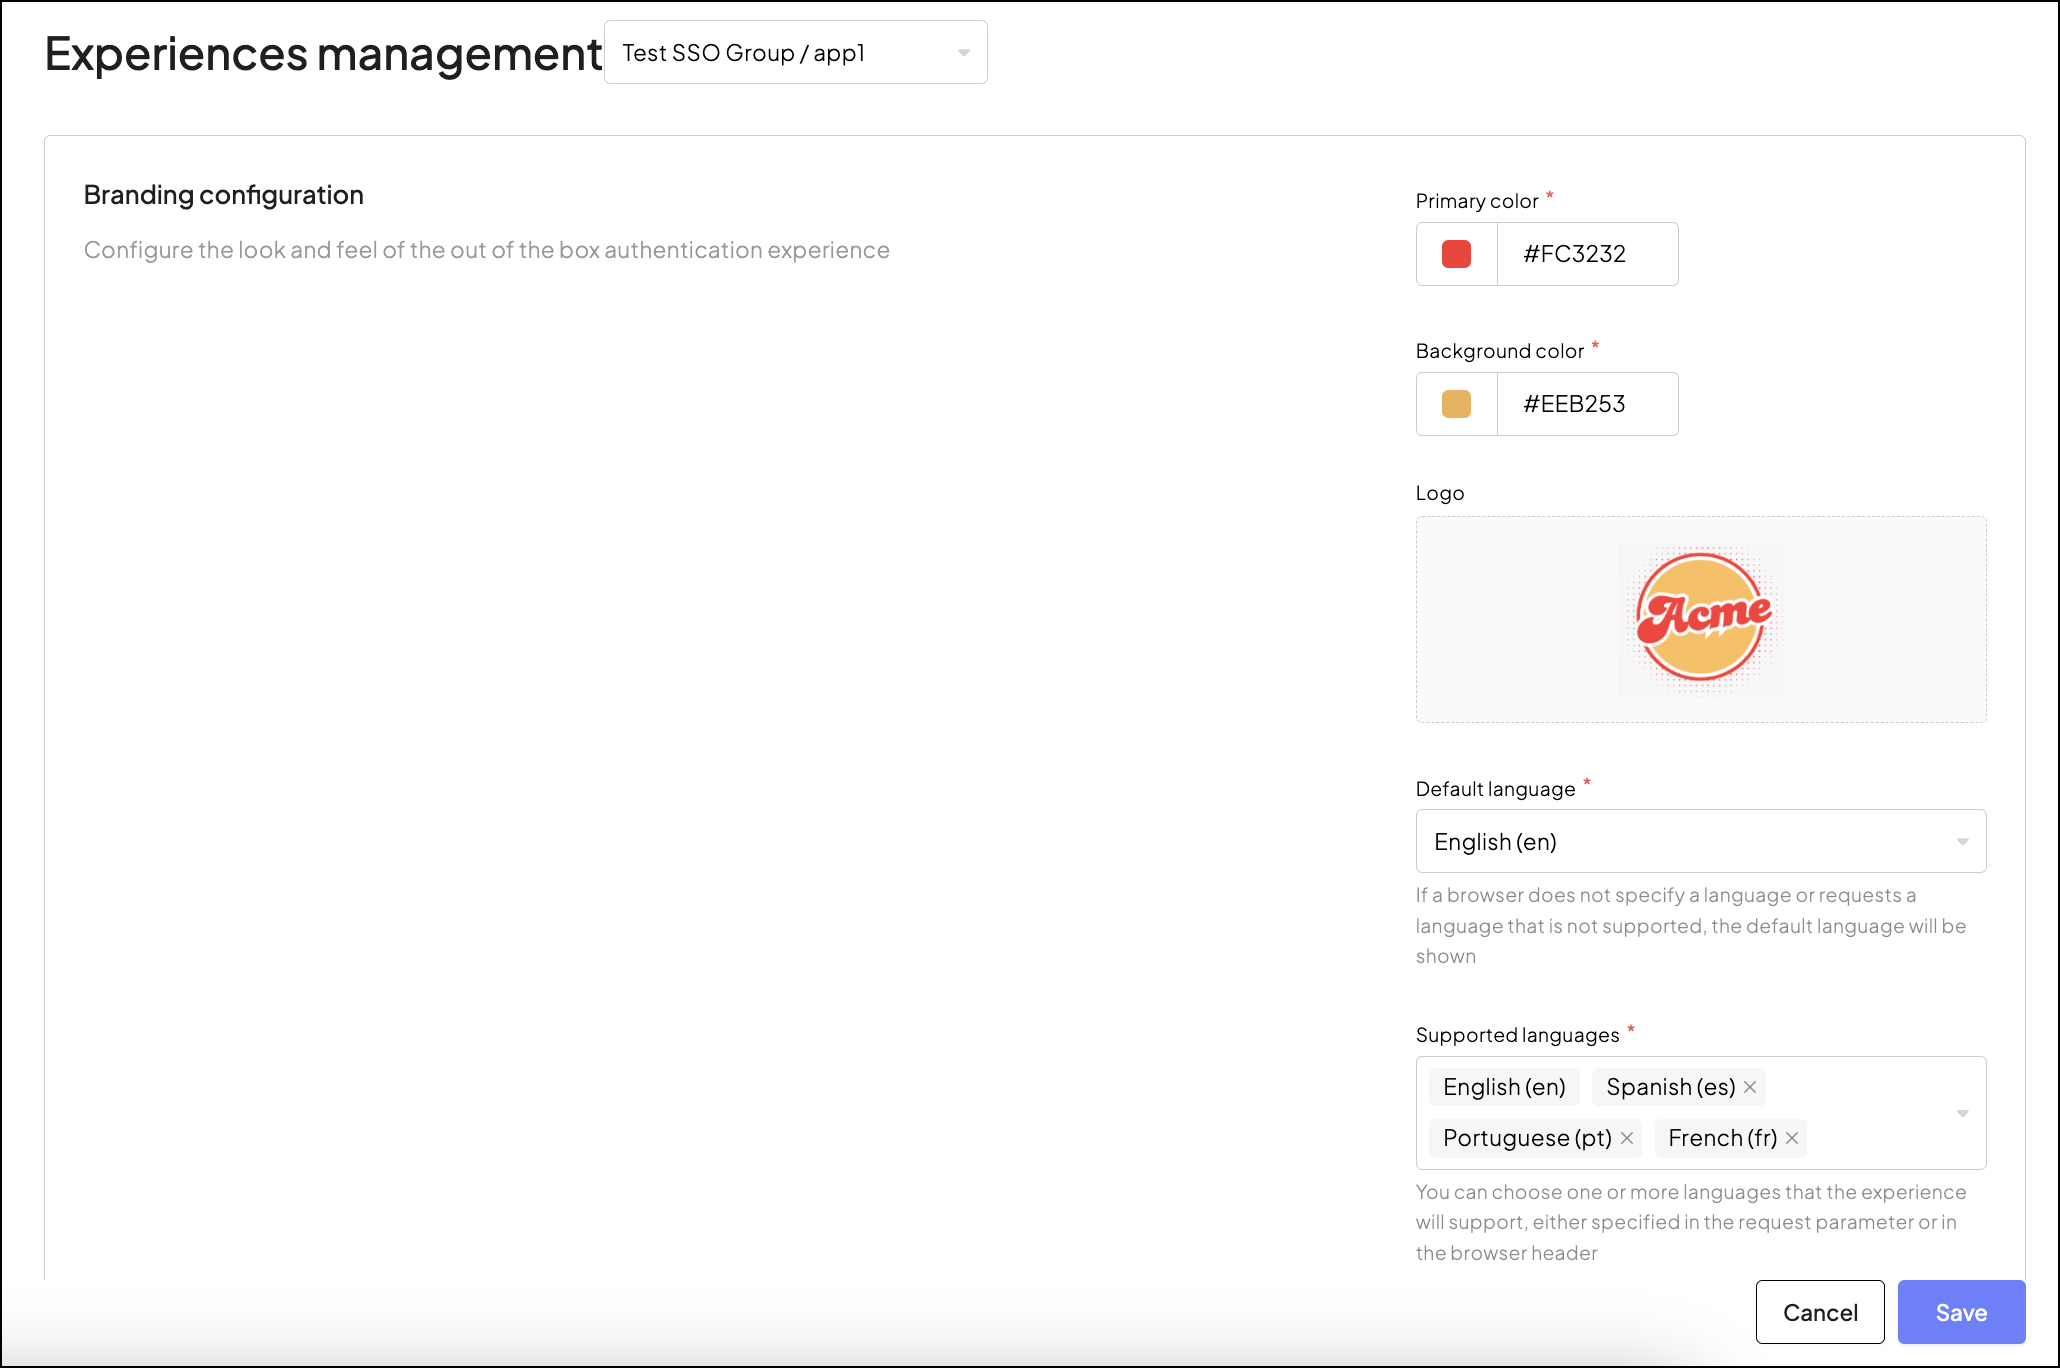
When you choose the Mosaic-hosted experience, you can customize it through the Admin Portal to align with your brand identity and language preferences. For more information about managing styles and assigning them to SSO clients, see Manage styling for the Mosaic-hosted SSO experience.
Localize the Mosaic-hosted experience by selecting the default language and additional languages your app supports, including English (en), Spanish (es), Portuguese (pt), French (fr), Janapanese (jp), French - Canada (fr-CA), Chinese - Traditional (zh-Hant), Chinese - Simplified (zh-CN). If the browser locale matches one of the enabled languages, Mosaic will automatically provide UI in this language. Mosaic will proceed to a default language in case the browser doesn't specify the language to use or if the locale coming from the browser isn't supported by your app. To learn about localizing SSO journeys, see Localize journeys.
These customization options ensure a consistent and branded experience across all your authentication journeys involving SSO.
In SSO, the organization's apps you want to link with SSO are configured in the Admin portal as clients. SSO is applied to groups of clients. Create and manage your client groups in SSO and Federation > Configuration > Client groups or via APIs.
If you're using Mosaic Journeys, you can associate a specific SSO journey to be triggered from your SSO experience and define a custom session timeout for all clients in the group. The default timeout is 14 days, and it can be configured up to 1 year.
Each client group can include clients using either OIDC or SAML protocols.
Set clients with OIDC
OIDC clients can be set up as either first-party (trusted applications belonging to your organization) or third-party, that are external applications that require explicit user consent for access. For more, see our [Consent APIs](/openapi/user/consents.openapi.json).The client type determines certain configurations and validations. Web App is selected for web-based applications, while Native App is chosen for applications installed on devices. This choice influences settings such as the redirect URI. For instance, a web app would need a URL redirect, whereas a native app might use a custom URI scheme like myapp://callback.
In both cases, specify the Redirect URIs to determine where users should be redirected after authentication.
Optionally, you can define a set of resources the client can access. This helps in providing SSO to specific or limited resources of an application or external services. For example, you might restrict access to user profile data and payment services only, ensuring that the client has limited and targeted access.
For more about implementing SSO with OIDC, see our Launch OIDC SSO with the Mosaic-hosted experience. For common client settings, see Manage clients.
Set clients with SAML
For SAML clients, you need to specify the Service provider (SP) ACS URL, which is the endpoint where SAML responses containing authentication assertions are sent after the user successfully logs in. This URL must be configured accurately to ensure that the authentication data is received and processed by the intended application.
Additionally, specify the Service Provider (SP) Entity ID, which uniquely identifies the service provider within the SAML framework. This is crucial for ensuring that the SAML responses are directed to the correct client application, maintaining the integrity and security of the authentication process.
After saving the SAML client configurations, Mosaic will autogenerate the following parameters, which are required on the Service Provider side:
The SAML SSO URL is created after saving the configuration and must be set within the relying party (RP). This URL acts as the gateway for routing login requests through the correct SSO mechanism.
The Transmit Entity ID uniquely identifies the Mosaic IDP in the SAML exchange, ensuring that SAML requests are routed to the Mosaic SSO service.
The X.509 Certificate is used to sign SAML assertions, securing communication between the application and the identity provider. This certificate is automatically populated after the configuration is saved.
For more about implementing SSO with SAML, see our Launch SAML SSO with the Mosaic-hosted experience.
SSO clients created in the client groups can only be used for authentication. To perform platform and user management operations, such as adjusting password policies or updating user records, configure an SSO management client—a special client for such chores (SSO and Federation > Configuration > Management clients). A management client can communicate with Mosaic via API independently of SSO journey, while its scope and permissions are controlled by assigned roles.
SSO management client is like a regular client in terms of configuration. For detailed instructions on how to create a client, see Manage clients.
In SSO journeys, when a user requests to authenticate to an app within a client group, the first step is to verify if a user session is active (using the SSO session validity step). The session timeout defines how long a user session remains valid before re-authentication is required. This ensures the journey takes appropriate actions based on the session’s status.
If the session is still valid, the journey can proceed with specific actions tailored to your business logic.
For example, you might display a redirection message and automatically authenticate the user without requiring their credentials, or if using MFA, only require their username for a lighter login experience. If the session has expired, the user will be prompted to re-authenticate by entering their credentials.
The SSO Service leverages the flexibility of Journeys. When configuring your SSO Service, you need to specify which SSO journey to execute for each client group. This allows you to define logic for grouping relying parties with similar behaviors and shared login processes into the same SSO group.
SSO journeys (journeys of "SSO journey" type) have additional features compared to client SDK journeys and are the only journeys compatible with the SSO Service. To learn more about the native logic of SSO journeys, see our dedicated SSO journey overview. For an example of an SSO journey, see our SSO tutorial.
To create an SSO journey, go to the B2C or B2B Identity section (based on your setup), select Journeys, and click Add blank journey. Then, choose the SSO-Journey type. Once the journey is created, it can be associated with client groups in SSO and Federation > Configuration > Client Groups > Journey.
In B2B scenarios, you can also leverage SSO journeys to invite and onboard new members. First create an SSO journey: go to B2B Identity > Journeys, click Add blank journey, and then choose SSO-Journey type. Once the journey is created, associate it with SSO Service: proceed to SSO and Federation > Configuration, expand the B2B configuration section and specify the journey. This B2B invite journey is triggered when an organization admin adds a member and sends them an invitation email via the Organization portal. The magic link in the email carries the org context and triggers a journey. Within this journey, the new member is onboarded through SSO service and, depending on the journey logic, may also be logged in.