Create and manage clients from Applications > your app > Clients in the Admin Portal. Each client belongs to a Mosaic application and has its own settings and credentials.
You can also use Mosaic application APIs with an access token for the relevant Mosaic application or an admin access token, or Client APIs with an access token for the relevant Mosaic application. The token must have the permissions required by the endpoint.
When you click + Add client, choose User authentication client for end-user authentication or Service client for service integrations. OIDC and SAML are protocol choices within the user authentication path.
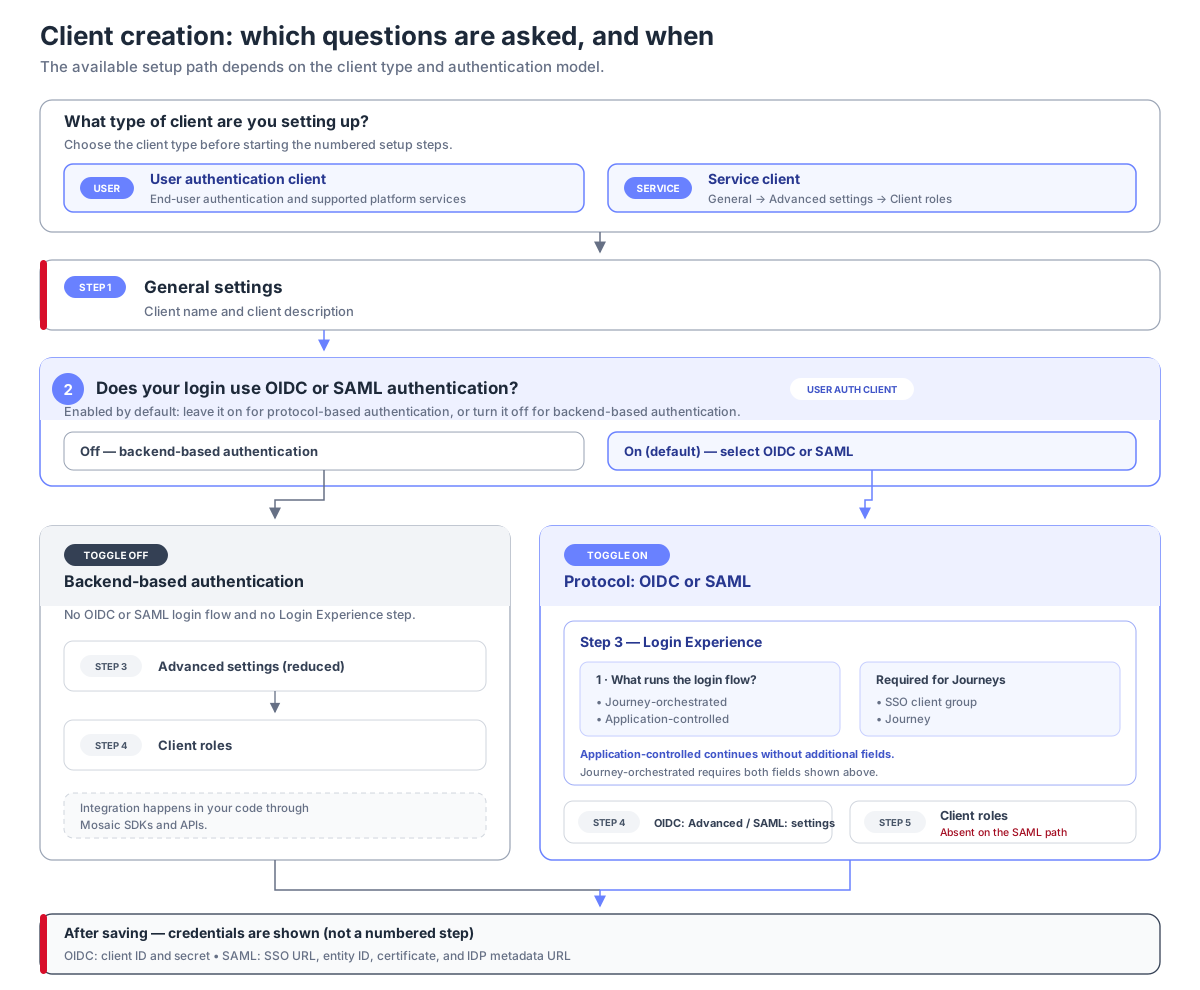
For web or native applications using OIDC, follow Configure OIDC clients. The guide includes advanced settings and client roles.
For authentication through Mosaic APIs or SDKs without an OIDC/SAML login flow, use the backend-based authentication path. The saved client is still an OIDC client.
For applications using SAML, follow Configure SAML clients, including SAML response settings.
For journey-orchestrated login, select the SSO client group and Journey in the client's Login Experience step. Configure the group's login screens and session timeout as described in Configure SSO.
For Fraud Prevention, Identity Verification, or machine-to-machine integrations, follow Configure service clients. These clients use their own authentication settings and client roles.
Open Applications > your app > Clients. The clients table shows each client's assigned SSO client group, and you can search and filter the clients. From the table:
- To edit a client, click
 and then Edit.
- To delete a client, click and then Delete.