LINE Login can be used to authenticate users, or create new users based on their LINE account.
Here's how it works: 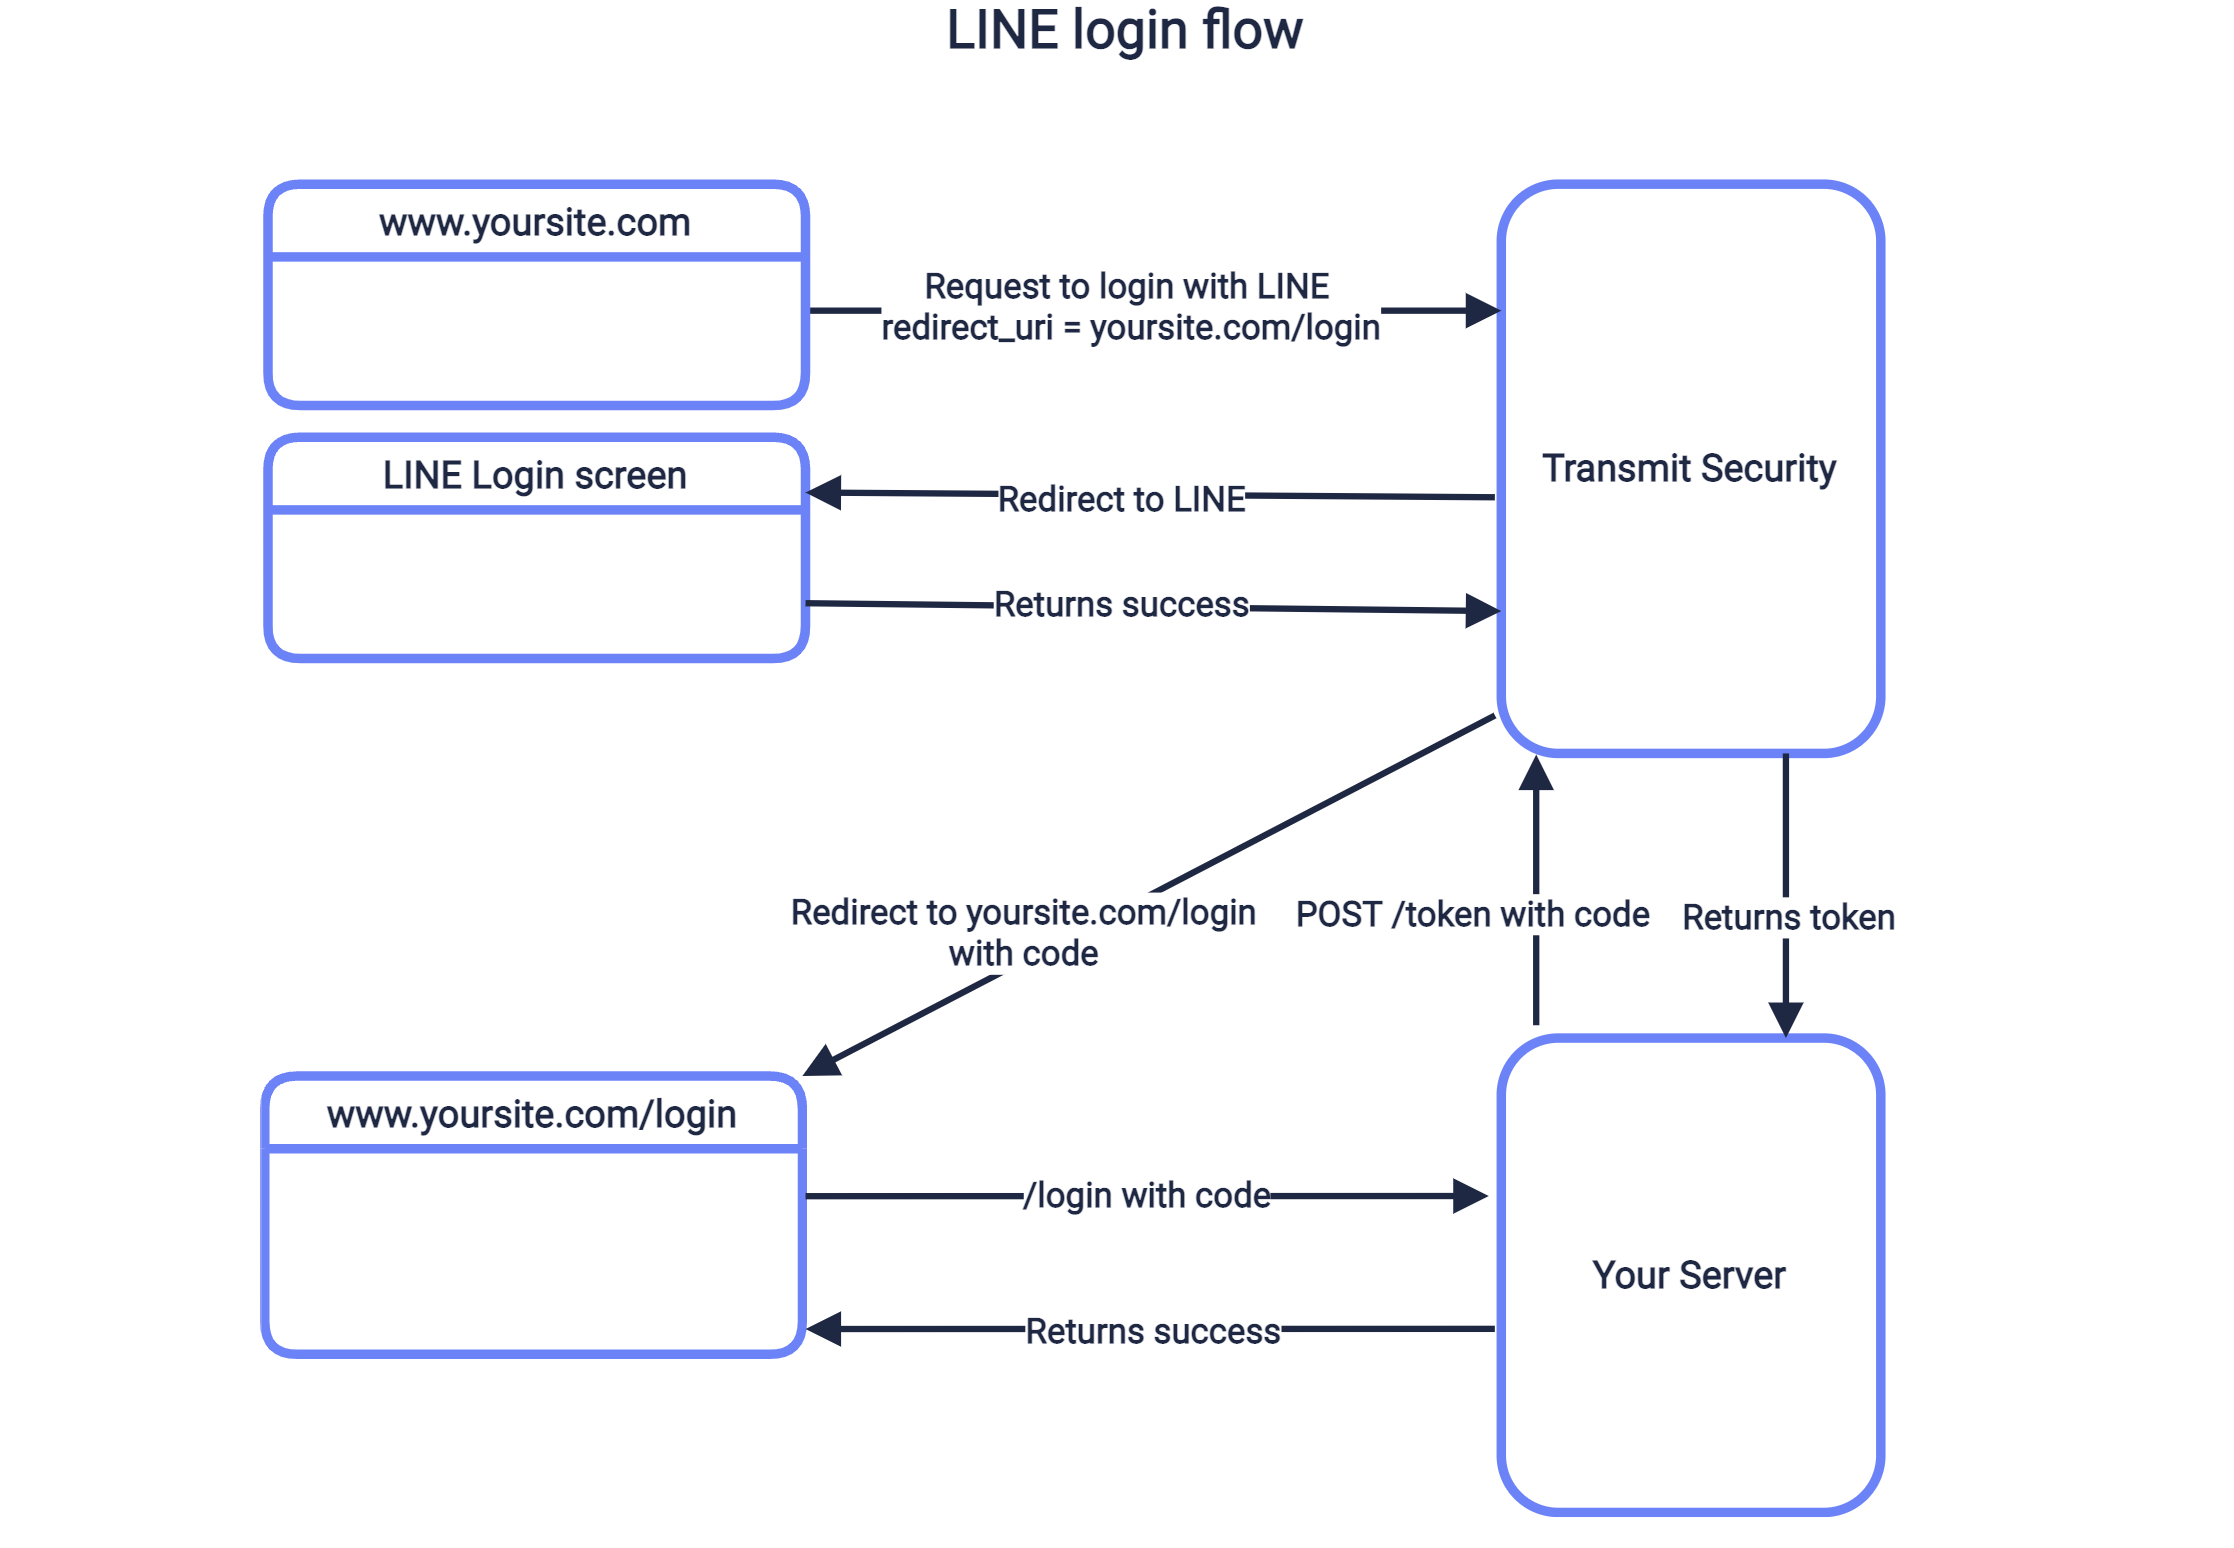
- User clicks login button, sending request to
/v1/auth/linewithclient_idandredirect_uri - Mosaic redirects to LINE login page, which authenticates user and redirects back to Mosaic.
- After validating the response, Mosaic redirects back to your
redirect_uriwith a code. - Your application sends the code to your backend, which exchanges it for a token.
- Upon a successful exchange, the user is logged in.
From the LINE Developers Console, you'll need the following:
- LINE account and Line Login channel for your app, if you don't already have them
- Callback URL set to
https://api.transmitsecurity.io/cis/auth/line/callbackas described here - Applied Email address permission as described here
- LINE Login Channel ID and Line Login Channel Secret
The LINE Login Channel ID and Channel Secret will be configured later in the Mosaic Admin Portal.
- Login to the Mosaic Admin Portal
- Go to Applications > your app > Authentication methods
- Expand the LINE settings.
- Fill in client ID and client secret using the LINE Login Channel ID and Channel Secret retrieved from LINE in Step 1.
To redirect back to the redirect_uri provided in the initial request, register it in the User authentication client used for this flow in the Mosaic Admin Portal. If you don't already have a Mosaic application, create one first (see Create Mosaic applications). Then open the application details page, go to the Clients tab, create or select the User authentication client used for this flow, configure it for OIDC, and add this URI under Redirect URIs. See Configure OIDC clients.
The client settings contain the Client ID and Client Secret for this integration, which you'll need for Step 4 and 5.
Use a request like the one below to initiate an authentication flow using LINE, described in the sequence diagram above. The create_new_user parameter will determine if this flow applies to new users, or only to existing ones. If set to true (and public sign-up is enabled for this application in Applications > your app > Advanced settings tab), a new user is created if no user is found for the email returned by LINE in the next step. The redirect_uri should correspond to the one added in step 3, and the client_id can be found in the client settings in the Mosaic Admin Portal (Applications > your app > Clients tab > your client).
Upon successful authentication, the browser will be redirected to the redirect URI along with a code to exchange for tokens in the next step. For example, if https://domain.com/verify is your redirect URI, then Mosaic will redirect to https://domain.com/verify?code=123abc. However, if an authentication error occurs after redirecting to LINE, the redirect URI will contain the error instead.
curl --request GET \
     --url 'https://api.transmitsecurity.io/cis/v1/auth/line?
     client_id=2eb840f.test.Transmit.io&
     redirect_uri=https://www.example.com/login&
     create_new_user=true' \
--header 'Accept: application/json'To exchange the code received from Mosaic for an ID and access token, your server should send a POST request like the one below to the Mosaic /oidc/token endpoint. Replace placeholders with the code you received in Step 4, your redirect URI, and your client credentials from the client settings in the Mosaic Admin Portal (Applications > your app > Clients tab > your client).
curl -i -X POST \
  https://api.transmitsecurity.io/oidc/token \
  -H 'Content-Type: application/x-www-form-urlencoded' \
  -d client_id=CLIENT_ID \
  -d client_secret=CLIENT_SECRET \
  -d code=CODE \
  -d grant_type=authorization_code \
  -d redirect_uri=REDIRECT_URI