Create an Authentication Hub
The Mosaic Authentication Hub allows you to create a centralized authentication experience across all your business lines. Use it to unify and centralize user identities, with an option to provide seamless single sign-on (SSO) across multiple apps.

How it works
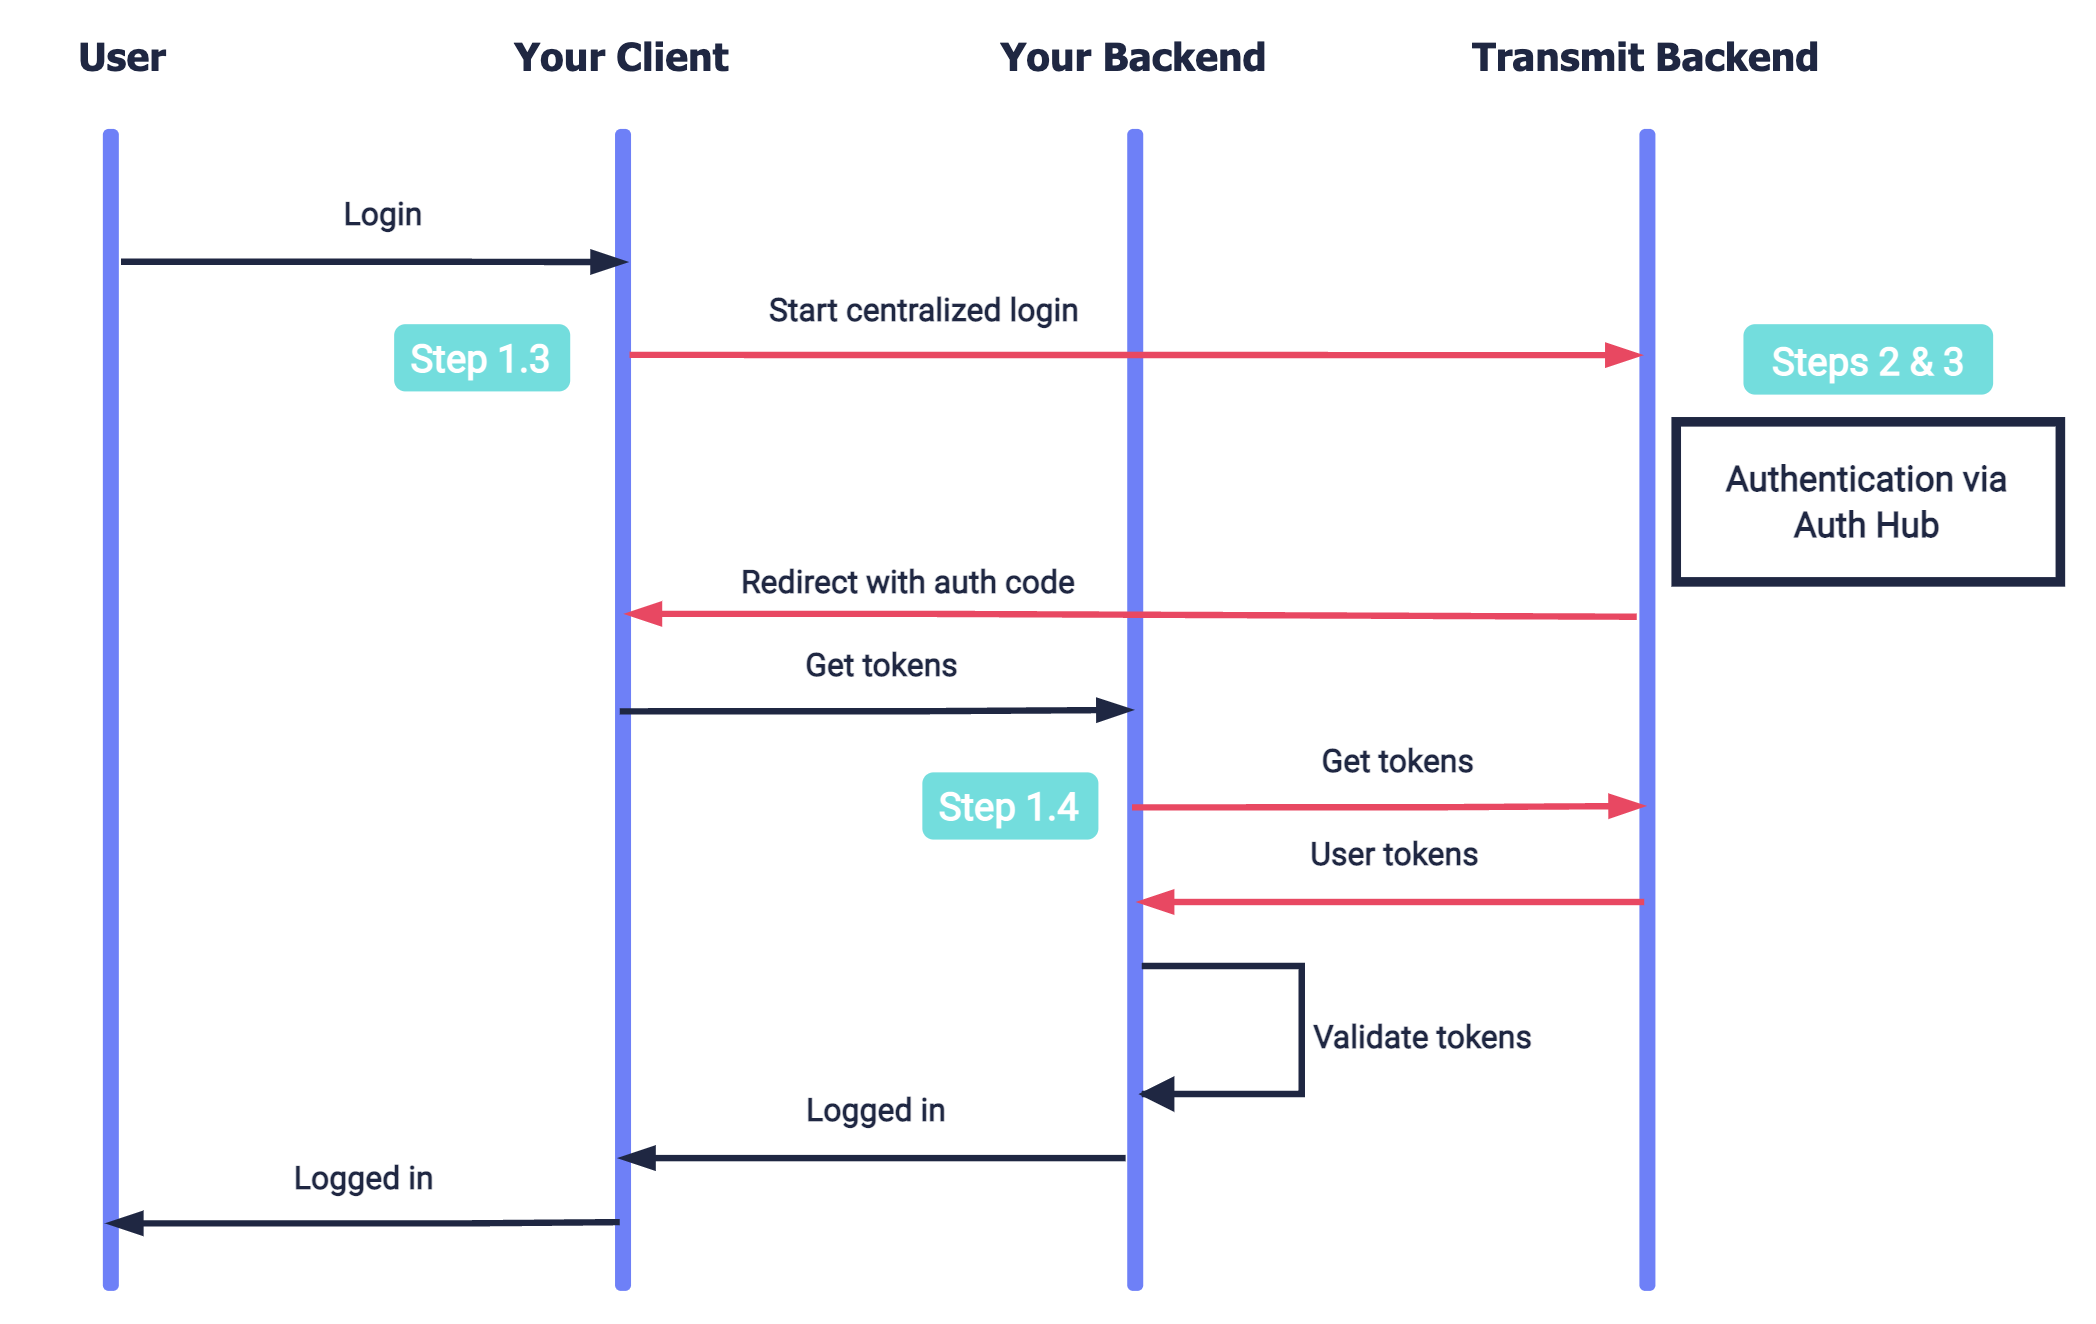
Whenever a user requests to log in to your app, they're redirected to the Authentication Hub - a dedicated web application that you create for authenticating users via Mosaic. It can be used by multiple apps in your tenant. This allows you to provide a uniform authentication experience across all your apps, and simplifies your implementation.
The Authentication Hub also allows you to silently authenticate the user (without user interaction) if the user is already logged into any app in your tenant. These sessions are managed by Mosaic in the backend. This removes friction from the login process without compromising on security.
Step 1: Set up your user apps
Set up your apps to perform a centralized login flow using the Authentication Hub. Instead of performing the end-user authentication, these apps will delegate it to the Authentication Hub:
To set up centralized login for an app:
1. Create your redirect endpoint
Create the redirect endpoint that will receive an authorization code when the Authentication Hub completes the user authentication process. This code will be exchanged for user tokens, as described in Step 1.4. The redirect URI should accept code as a query parameter. For example, if https://domain.com/verify is your redirect URI, Mosaic will redirect to https://domain.com/verify?code=123abc when the centralized login flow is complete.
Note
If an authentication error occurs, the redirect URI will contain the error instead.
2. Configure your user app
From the Applications page of the Admin Portal, select your application to edit its settings. If you don't already have an application, create an application.
- Under Redirect URIs , add the URI created in Step 1.1 as an allowed redirect URI for your Mosaic application.
- Under Public sign-ups , select Allow registration to allow the application to auto-create new users as part of the login flow. Login flows can only be completed by existing users that are associated with the application.
3. Request centralized login
When a user requests to log in, send a centralized login request like the one below. This is an OIDC authorization call that requests urn:transmit:centralized in the acr_values. Pass your client ID, your redirect URI, and createNewUser as true so new users will be signed up to the app. Once the centralized login is completed, an authorization code is returned to the requested redirect URI in the code parameter. This code will be exchanged for a token in the next step.
curl -i -X GET \
  'https://api.transmitsecurity.io/cis/oidc/auth?client_id=CLIENT_ID&scope=openid&response_type=code&redirect_uri=REDIRECT_URI&acr_values=urn:transmit:centralized&createNewUser=true'
4. Get user tokens
To obtain an ID and access token, your server can send a request like the one below to the OIDC token endpoint. Replace placeholders with the code you received in Step 1.3, your redirect URI, and your client credentials that can be found in your application settings from the Mosaic Admin Portal.
Note
Returned tokens must be validated as described here.
curl --location --request POST 'http://api.transmitsecurity.io/oidc/token' \
--header 'Content-Type: application/x-www-form-urlencoded' \
--data-urlencode 'code=CODE' \
--data-urlencode 'client_id=CLIENT_ID' \
--data-urlencode 'client_secret=CLIENT_SECRET' \
--data-urlencode 'grant_type=authorization_code' \
--data-urlencode 'redirect_uri=REDIRECT_URI'
Step 2: Set up your auth app
Centralized authentication is performed using a dedicated web application - your Authentication Hub:

To set up an Authentication Hub:
1. Create your login endpoint
When your user app requests centralized login, Mosaic will invoke the Authentication Hub by redirecting to your login endpoint. The login URI should accept src_interaction as a query parameter, which marks the state of the centralized login flow. The login endpoint should respond by executing the authentication flow described in Step 3.
Once the authentication flow is completed, the login endpoint should send a callback to /auth/centralized/callback to complete the login with the following parameters in the query:
-
code- authorization code returned in Step 3 upon successful authentication -
error- error returned in Step 3 if the authentication fails
curl -i -X GET \
  'https://api.transmitsecurity.io/cis/auth/centralized/callback?code=[auth_code]'
2. Configure your Authentication Hub
From the Applications page of the Admin Portal, create the application that will be used as your Authentication Hub. Configure the application with a redirect URI to receive the authorization code upon successful authentication, and enable the application for public sign-ups (same as what's described in Step 1.2).
Under Authentication Hub, select Set as authentication hub and set your login URI as the Authentication hub URL.
Note
Each tenant can set a single application as the Authentication Hub for the tenant.
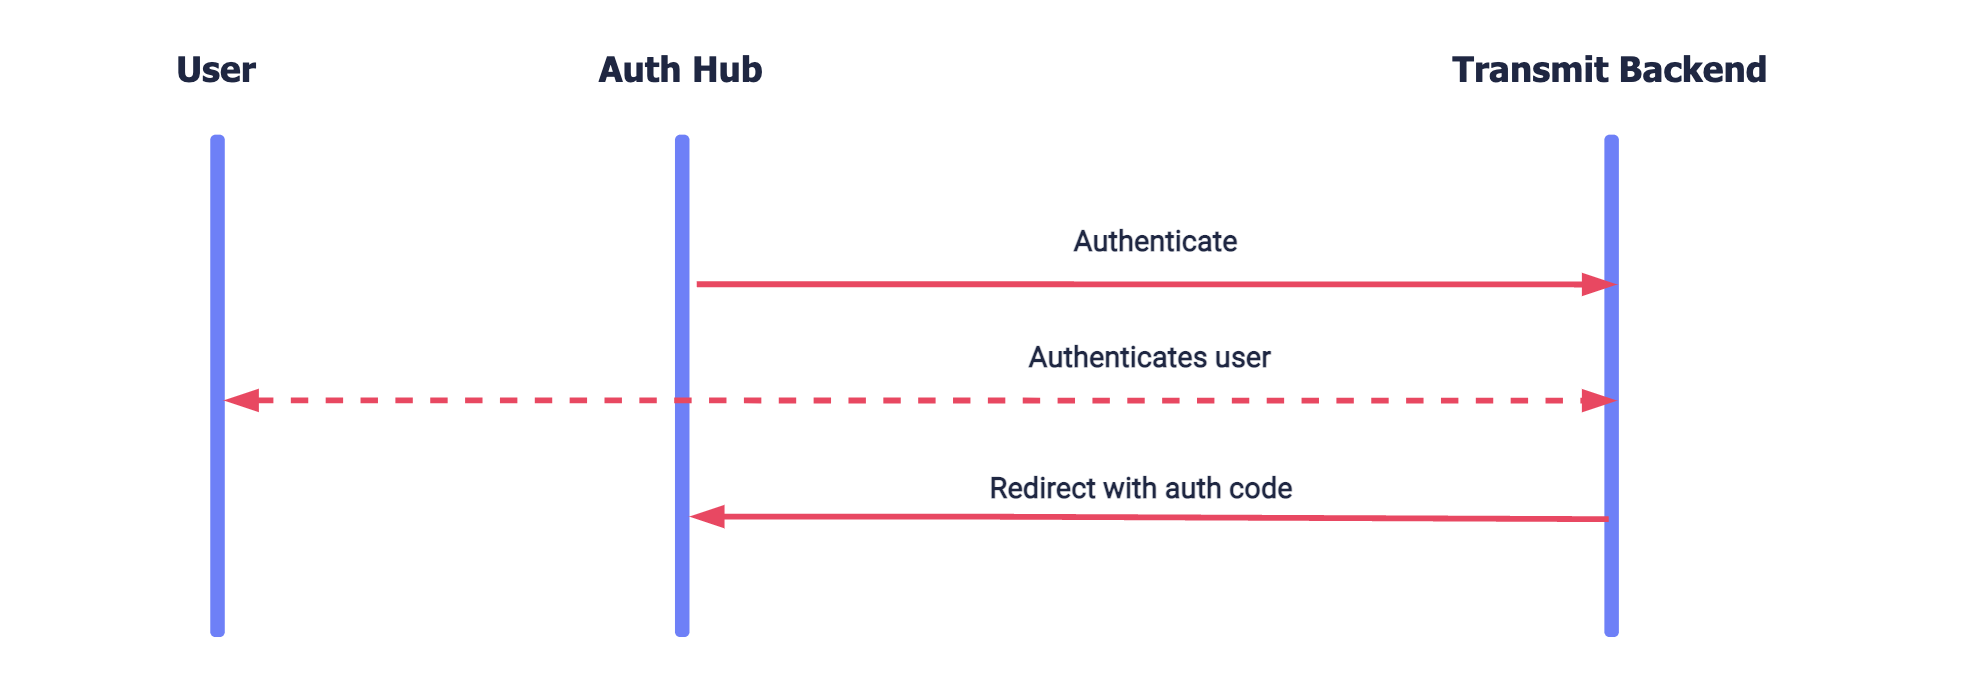
Step 3: Implement auth flows
Implement the end-user authentication flows executed by your Authentication Hub for centralized login, and optionally, SSO across your apps. Here's an example of a basic authentication flow (without SSO):
Implement the authentication methods used to authenticate the user. You can implement any method using the authentication guides. Or implement an OIDC-based integration for WebAuthn biometrics or social login, including:
- Configuring the relevant authentication method for the application (see OIDC guide: Step 1 )
-
Sending an OIDC auth request with
prompt=loginandcreateNewUser=true(see OIDC guide: step 3 )
Once the authentication is completed, pass the authorization code to the callback described in Step 2.1 to complete the login flow in the Authentication Hub. However, if an authentication error occurs, the redirect URI will contain the error. Pass this error in the callback instead so that Mosaic can redirect to the initiating user app with the error.
Note
To add SSO login, implement the setup described in Set up SSO across your apps. The silent authentication will be requested using the client ID and redirect URI of the Authentication Hub (configured in Step 2.2).