Set up Admin Portal SSO
In the Admin Portal, you can use SSO to authenticate admins via an external OIDC provider (for example, Google or Microsoft) instead of using an email magic link. Once SSO is set up, after admins enter their email address on the Admin Portal login page they are authenticated by the configured OIDC provider (using the provider's authentication flow when they are not logged in to their provider's account).
To make sure the Admin Portal is always accessible, you must add the email address of at least one admin user when you set up SSO authentication (ideally, more than one admin user should be added). These users are known as recovery admins and they can access the Admin Portal even when there is an issue with SSO (for example, the SSO provider is down or incorrectly configured). When recovery admins log in to the portal, they choose whether to authenticate using SSO or an email link. This ensures SSO authentication can be reconfigured or disabled if needed.
To set up an OIDC provider, you'll need a client ID and secret (created in your provider's portal), the URL of your provider's OIDC endpoint (Issuer URL), and the Mosaic redirect URL which is defined in the provider's portal and used to redirect the browser back to the Mosaic Admin Portal after the user has been authenticated.
The setup is similar for all OIDC providers:
Step 1: Set up your OIDC provider
- In your OIDC provider's portal, create an application for the Mosaic Admin Portal. You should receive a client ID and secret after creating the application.
- In your OIDC provider's application, add the Admin Portal's redirect URL: https://api.transmitsecurity.io/cis/auth/sso/callback
Step 2: Configure Mosaic Admin Portal
- In the Admin Portal, go to Settings > SSO .
-
Enable SSO configuration.
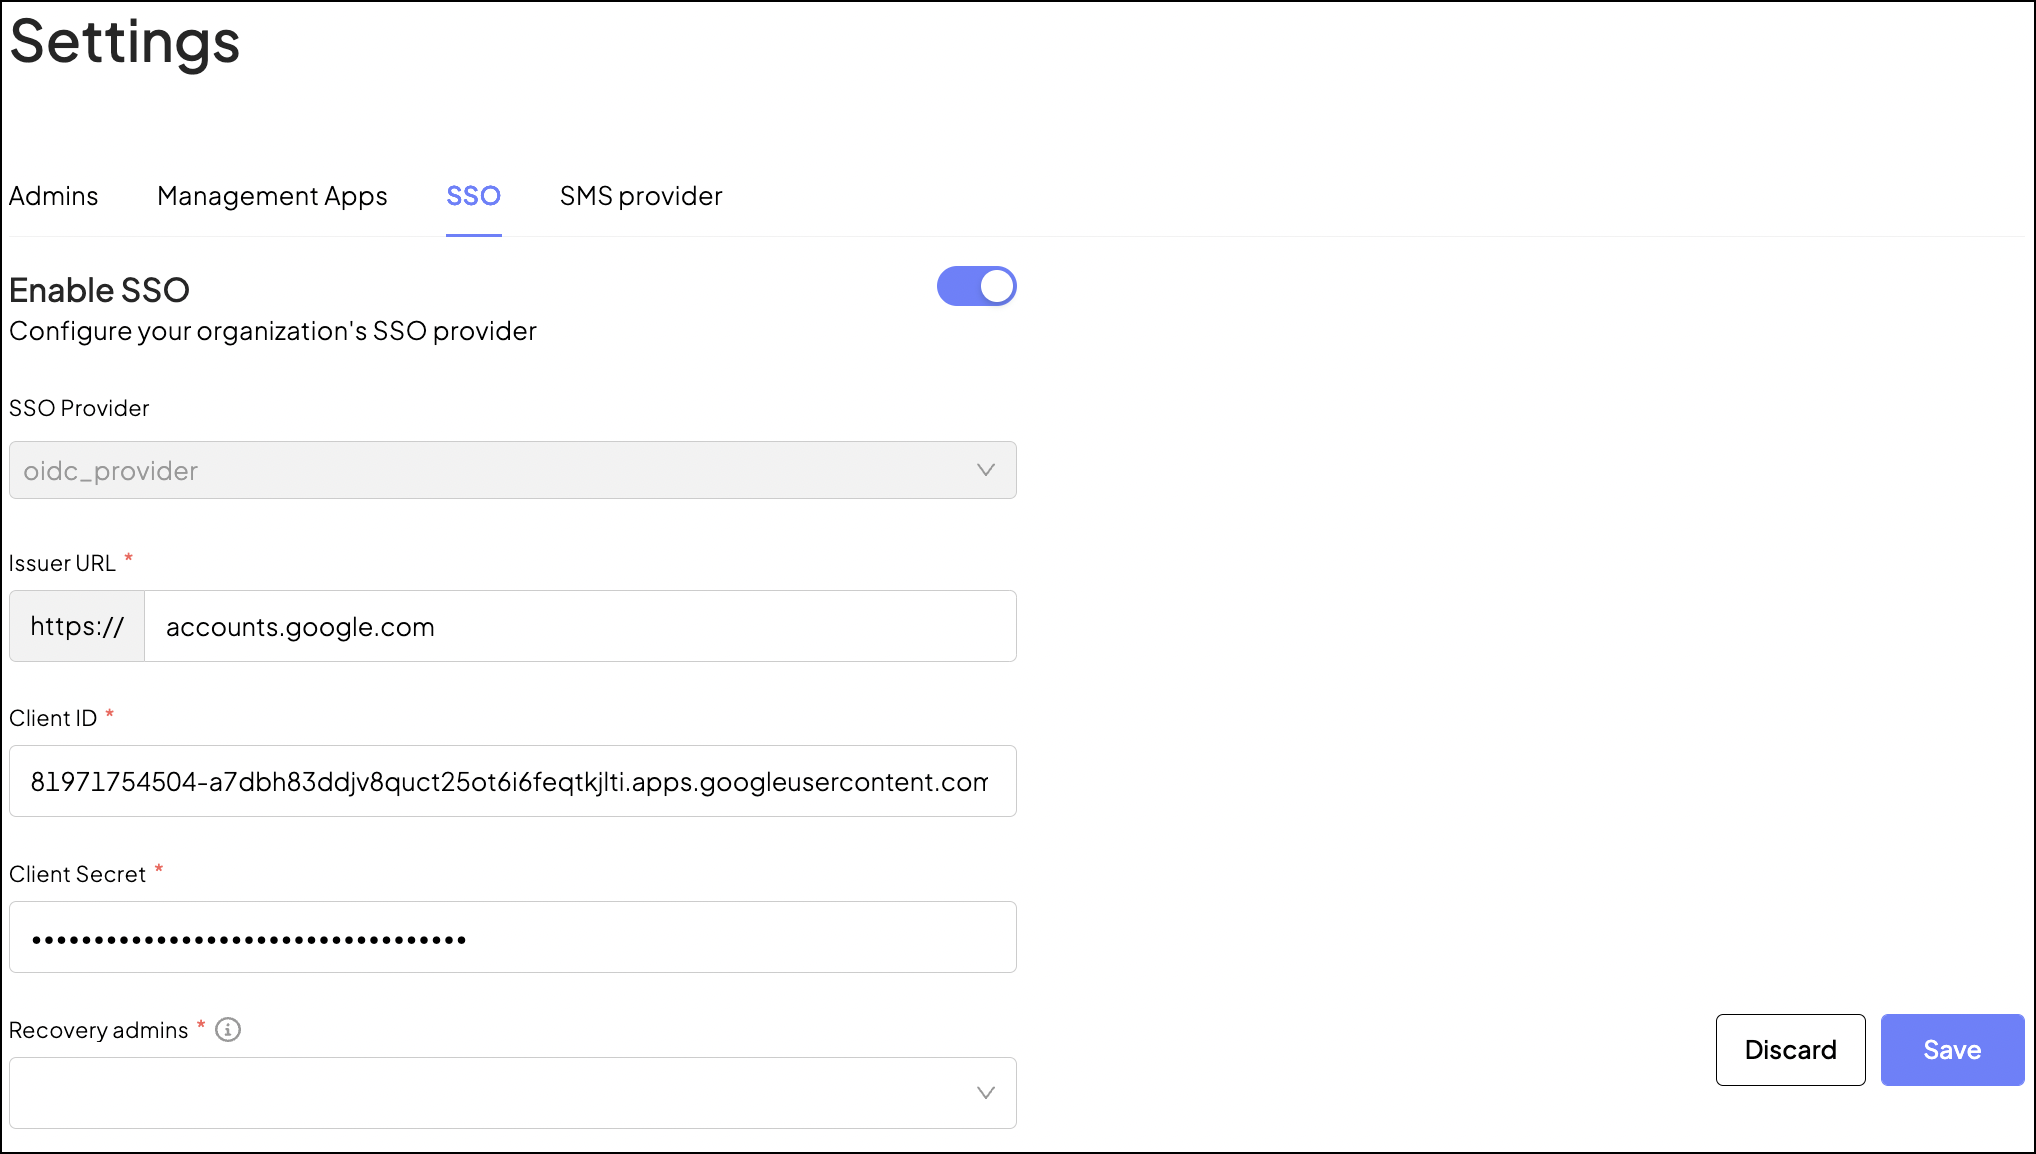
- Copy the provider application's client ID and secret to their respective fields in the Admin Portal.
- In the Issuer URL field, add your provider's OIDC endpoint.
- In the Recovery admins field, select at least one admin user. The selected users will have the option to log in to the Admin Portal via SSO or an email link.
- Save your changes.
You can find detailed information on configuring Google and Microsoft SSO below. For more information on setting up other providers, see their documentation.
Microsoft SSO
- In the Azure Portal , register a new app for Microsoft's identity platform using their documentation .
- Add the Azure app's redirect URL for returning to the Mosaic Admin Portal after authentication: https://api.transmitsecurity.io/cis/auth/sso/callback .
- Configure the Azure platform settings for web applications.
- Create a client secret and then copy the secret's value from the Azure Portal and paste it into the Client Secret field on the Settings > SSO page in the Mosaic Admin Portal.
-
Copy and paste these field values from the Azure Portal to the
SSO
page in the Mosaic Admin Portal:
- Application (client) ID (Azure Portal) to Client ID (Mosaic Portal)
-
OpenID Connect metadata document
(Azure Portal) to
Issuer URL
(Mosaic Portal)
See Find your OpenID configuration document URI for information on how to view the OpenID Connect metadata document URL.
Google SSO
- In the Google Cloud console, use Google's documentation to either create or use an existing project for setting up Google SSO.
- Create a client ID and secret for the web application.
- Add the redirect URL for returning to the Mosaic Admin Portal after authentication: https://api.transmitsecurity.io/cis/auth/sso/callback .
- Customize the user consent screen as required.
-
Copy and paste these fields from the Google Cloud console to the
SSO
page in the Mosaic Admin Portal:
- Your Client ID (Google console) to Client ID (Mosaic Portal)
- Your Client Secret (Google console) to Client Secret (Mosaic Portal)
-
On the
SSO
page in the Mosaic Admin Portal, enter this value in the
Issuer URL
field:
accounts.google.com.