Client SDK journeys are the simplest journey type, designed for workflows that require client-side interactions, such as collecting user input, performing device operations, or presenting authentication methods. These journeys run within your client application and leverage the Mosaic SDK.
This tutorial provides an introduction to building client SDK journeys, guiding you through creating a user with an email and password, and authenticating the user using auto-generated client-side code—no app development needed. Ready to start?
To integrate with Mosaic, configure an application in the Admin Portal as shown below. For example:
- Application name: My demo app
- Protocol: OIDC
- Client name: Demo client
- Redirect URIs:
https://demoapp.com/verify - Authentication method: Client secret
Upon saving, Client ID and Client Secret are generated automatically. You'll need them for running the client-side.
Create and execute the journey that collects user details and creates a user:
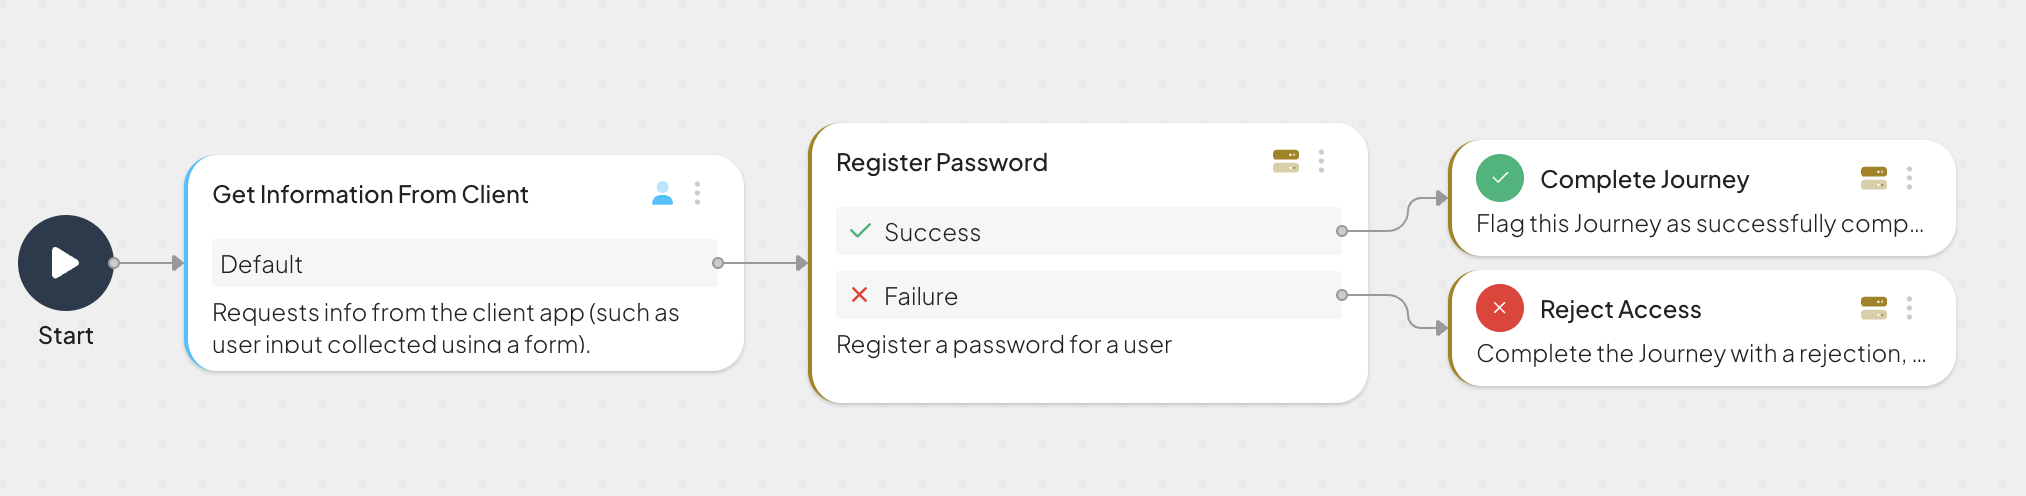
Start by creating a blank client SDK journey. You can do it in the Admin Portal, by proceeding to B2C or B2B Identity (based on your setup) > Journeys.
Add the "Collect information" node that collects an email and password from the user. Complete its configuration as follows:
- Set the Step ID to
userForm - Keep the schema as is
- Keep the default name for the output variable (
clientData)
Add the "Register password" node that sets the password for the user record and creates the user if none exists. Complete its configuration as follows:
- Set User auth state to "The user is not authenticated..."
- Set external User ID to
clientData.userEmail - Set Password to
clientData.userPassword
After saving the journey, you can test the flow. One option is to run the journey in the browser using the Test journey button. The other option is to download the code and then run it locally. When running the code locally, provide the Client ID and Secret you obtained in Create app step.
Upon initializing the journey, you'll see the default UI provided by Mosaic. You can proceed to submit user details, for example, "user@demoapp.com", "MyPassword123$".
Having created the user, go to B2C Identity > Users in the Admin Portal to view the user profile.
Create and execute the journey that allows a user to enter their credentials and authenticates a user with a password:
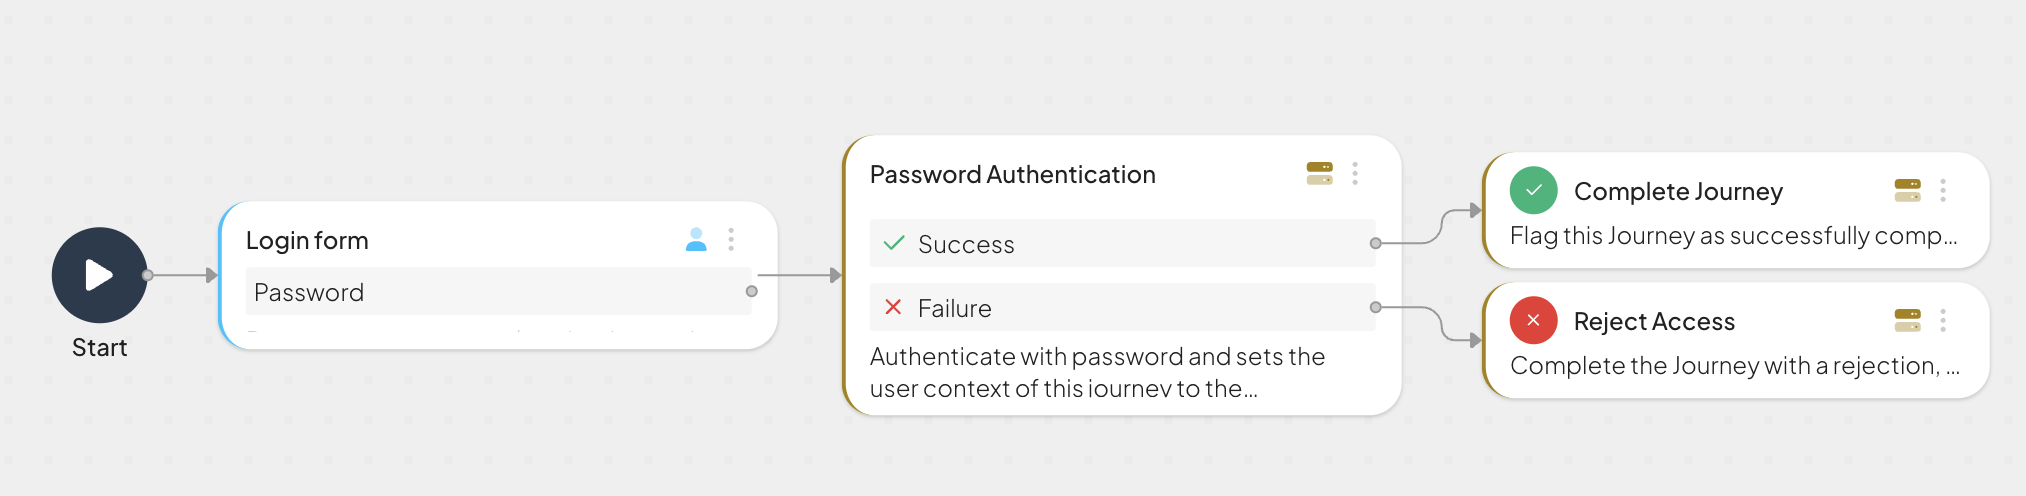
Start by creating a blank client SDK journey. You can do it in the Admin Portal, by proceeding to B2C or B2B Identity (based on your setup) > Journeys.
Add the "Login form" node that allows a user to enter their credentials. Complete its configuration as follows:
- Keep the Step ID as is
- Disable all authentication methods except Password
- Set the output variable to
loginData
The "Password authentication" node is added automatically and is configured to use credentials stored in the loginData variable.
After saving the journey, you can test the flow. One option is to run the journey in the browser using the Test journey button. The other option is to download the code and then run it locally. When running the code locally, provide the Client ID and Secret you obtained in Create app step.
Upon initializing the journey, you'll see the default UI provided by Mosaic. You can proceed to submit the credentials of the user you created in Exercise 1, for example, "user@demoapp.com", "MyPassword123$".
Proceed to Events / User Activity to see events related to this user. You'll see the user login event.
Consider combining the journeys you created into a single flow and adding more authentication options.
Enable double encryption to provide extended security on top of SSL. See Securing journeys
Learn how to integrate Journeys into your apps:
Here are some ways to get started:
There's nothing like a good clean-up. You can do this from the Admin Portal. From B2C Identity > Users, hover over your user in the user list, click ![]() on the right, and click Delete.
on the right, and click Delete.